
How can we help?

[{id=191604258401, createdAt=1750439292474, updatedAt=1782761476285, path='creating-rental-contracts', name='Creating Rental Contracts', 32='{type=number, value=1}', 2='{type=string, value=http://rainpos.my.site.com/s/article/Creating-Renal-Contracts}', 4='{type=list, value=[{id=4, name='music_shop_360', order=3, label='Music Shop 360'}]}', 6='{type=string, value=
You can begin setting up a Rental Contract by clicking on the Register button on the far left, or you can click the +Create New button at the top of the system.
Creating a Rental Contract
Please Note: Before you begin setting up a Rental Contract, you need to have already completed the setup of the Rental Contracts module. To see how to set up for rentals, click here: Point of Sale Settings: Rental Contracts.
- Once your settings have been configured, go to your Register (click on the Register button on the far left).
- Load the Customer (or create a new Customer in the system, make sure they are saved to your Customer list before you proceed).
- On the far right side of the Register, click on any of the Customer Action icons. If the Customer already has a Rental Contract saved in the system, you will see the handshake icon highlighted in gold.
- Find the section for Rental Contracts in your Customer Actions panel and click the + button to start your new contract. Please note that from this area, you can also click the Pay button on an existing Rental Contract listed for the customer.
You are now ready to configure your initial contract for this rental. When you click the + button, the Add Rental Contract panel will open. Here are the steps you need to take (please note that you may want to start by adding your item(s) for Rent to Own in #8, below; those items can be any product saved in the system, so make sure the item(s) in your new contract are saved):
- Rental Information - Key details about the Customer as well as the name of the Store Location where the Rent Contract is being created will be listed here. Clicking on the links to the highlighted items here (in this example, Customer Name and Phone) will open the Customer detail panel so you can access their full info. Please note that you will also be able to access this panel whenever you click to open an active Rent to Own, either from the Register or from Modules > Rental Contracts.
- Contract Details- You can set the Contract Type to be Rent to Own or Rent Only (rent to rent). For the Payment Frequency, you can set it to be Monthly, Quarterly, or Yearly. In the Term area, you can set the total Number of Months, Years, or Weeks. You can also set your Interest Rate here.
Please Note: These fields, once the contract is initially saved, will also become un-editable, so make sure you get the info in the way you will want it from the start. Read the note above on how to delete the contract if you saved the info the wrong way. - Total Financed - This section details the total amount the customer is financing, the tax, and gives you fields to enter any Rental Credit that may apply or Down Payment that will reduce the total. Please note that these fields are only visible during this initial creation of the contract. Once you save it, either of these fields that have values entered in them will be visible to show those respective values, and any that had nothing entered will not display, and neither can be edited after that initial save.
- Item Search & Line Items - You can Search for and add the item or multiple items for the Rental Contract here. You can rent as many items as you like in a single contract. This area will display the Line Item(s) being rented in the same manner as the Register, including a thumbnail image. You can manually set the Price, if needed, the Quantity, and by clicking the Price Tag icon in the Discount column, you can set a Line-Item Discount by percentage off or dollar-amount off, as needed.
- Payment Details - This section displays the base amount for the Monthly Rental Payment, with the interest rate already combined, if any. It will also populate your Monthly Maintenance and Monthly Insurance fee amounts. All three of those fields can be edited, if you need.
Please Note: After you create this initial contract and save it, you will not be able to edit these fields any longer, so make sure they are set correctly. If you save a contract with incorrect numbers, you will need to delete it (go to Modules > Rental Contracts > click on the contract ID Number, find the Delete button near the bottom of the panel and click it), and then re-create the contract with the correct information. - Payments - This area shows how many payments are scheduled and how much each payment needs to be. If you click on Scheduled Payments you'll see a schedule like this one:
In addition to the payment breakdown displayed in the Payment Schedule, you can also click on Next Payment Amount to see a breakdown of the components of just the monthly payment, like this (Estimated Tax not shown in this example):
- Auto Pay - If you want the system to automatically bill the customer each period, set this to ON. You can also click to Add Primary Card and Add Secondary Card (in case the primary fails for whatever reason). A Secondary Card is not required by our system. Please note that the Credit Card Automated Settings to retry failed card charges in the Settings for Rental Contracts will not work if this setting isn't ON. Here is the interface for adding a card:
If the Primary Card should fail, the Secondary is charged, and no extra fees are charged to the customer. If you plan to allow the customer to mail in checks or make payments in person or by phone, you can set this to OFF.
- Summary - Once all of the fields in the Add Rental Contract panel have been filled in, the Total Financed and the Due Today fields will be populated with their final amounts.
- Special Functions - Upload Signed (Contract) - If you wish to use pre-printed contracts, after you have clicked the Collect Signature button and printed off one of your contract templates, you can scan or photograph them, then click this button to upload them to the Rain system cloud for secure storage.
Print - If you wish to print out the dynamic contract you configure in the Rent to Own Settings area for signature, all fields you entered in that form contract will be auto-filled with the terms you have entered in this panel. You can have the customer initial and sign, then you can either scan the document or photograph it and then it can be uploaded to the Rain system cloud for secure storage. You can also click the button to Collect Signature to load one of your pre-saved contract templates. Please note, this will require an integrated processing terminal that allows on-screen signatures. If you do not do integrated processing with Rain Payments, you will need to use the Upload Signed function.
Once you have completed all steps, click the Save button to finalize the contract. PLEASE NOTE: Most of the fields that are editable in this contract creation panel will be set in stone after this save, so make sure all of your information is correct before you save the contract! If you have incorrect information in any of the areas noted above that are not editable after the save, you will need to delete this contract and recreate it with the correct information. To delete it, go to Modules > Rental Contracts > click on the contract ID Number, find the Delete button near the bottom of the panel and click it, and then re-create the contract with the correct information using the steps detailed above.
A Note on Tax
Please Note: The following does NOT constitute official advice from MusicShop360 on how to process your taxes. It is simply information you as a business owner should be aware of regarding best practices typically recommended by tax consultant groups familiar with the Rental Contract/Rental industry.
It may seem logical to include taxes in the total listed in your contracts, but this may not be the best approach.
Consider the following scenario: A shop owner creates rental contracts with a school for 100 band instruments for a term of 36 months. Included in the contract were the taxes, which at the time of signing were 6.5% for the area. A year into the contract, the state legislature increases the state tax to 8.5%.
The owner is now liable to pay the additional tax amount for all items, and any similar contracts, entirely out-of-pocket throughout the rest of the terms. If the owner attempts to increase the monthly payments, he or she will be in breach of contract.
With this scenario in mind, you may wish to adjust your contracts to list pre-tax totals for payment amounts. In this way, the fluctuations of your tax rates will not affect your contracts in any way.
Initial Checkout
If an initial or down payment is being made, you will be taken back to the Register where the Customer and a line item for the first Rental Contract payment will be loaded.
Please Note: that since you do all applicable Discounts when creating the Rental Contract, you do NOT have the option of discounting the individual payments in the Register. Global Transaction Discounts (with the % button on the right in the Discount line) and Customer Discounts will not override this. You CAN, however, manually change the Amount field, if needed. The Tax is already figured into the base amount for the Payment, so you will not see tax applied to this transaction.
Here is how a completed payment will show up on the customer's receipt:
}', 22='{type=option, value={id=2, name='recommended_extra', order=1, label='Recommended Extra'}}', 9='{type=string, value=Creating Rental Contracts}', 25='{type=number, value=1}', 26='{type=list, value=[{id=190209692542, name='Modules'}]}', 28='{type=string, value=Creating Rental Contracts You can begin setting up a Rental Contract by clicking on the Register button on the far left, or you can click the +Create New button at the top of the system. Creating a Rental Contract Please Note: Before you begin setting up a Rental Contract, you need to have already completed the setup of the Rental Contracts module. To see how to set up for rentals, click here: Point of Sale Settings: Rental Contracts. Once your settings have been configured, go to your Register (click on the Register button on the far left). Load the Customer (or create a new Customer in the system, make sure they are saved to your Customer list before you proceed). On the far right side of the Register, click on any of the Customer Action icons. If the Customer already has a Rental Contract saved in the system, you will see the handshake icon highlighted in gold. Find the section for Rental Contracts in your Customer Actions panel and click the + button to start your new contract. Please note that from this area, you can also click the Pay button on an existing Rental Contract listed for the customer. You are now ready to configure your initial contract for this rental. When you click the + button, the Add Rental Contract panel will open. Here are the steps you need to take (please note that you may want to start by adding your item(s) for Rent to Own in #8, below; those items can be any product saved in the system, so make sure the item(s) in your new contract are saved): Rental Information - Key details about the Customer as well as the name of the Store Location where the Rent Contract is being created will be listed here. Clicking on the links to the highlighted items here (in this example, Customer Name and Phone) will open the Customer detail panel so you can access their full info. Please note that you will also be able to access this panel whenever you click to open an active Rent to Own, either from the Register or from Modules > Rental Contracts. Contract Details- You can set the Contract Type to be Rent to Own or Rent Only (rent to rent). For the Payment Frequency, you can set it to be Monthly, Quarterly, or Yearly. In the Term area, you can set the total Number of Months, Years, or Weeks. You can also set your Interest Rate here. Please Note: These fields, once the contract is initially saved, will also become un-editable, so make sure you get the info in the way you will want it from the start. Read the note above on how to delete the contract if you saved the info the wrong way. Total Financed - This section details the total amount the customer is financing, the tax, and gives you fields to enter any Rental Credit that may apply or Down Payment that will reduce the total. Please note that these fields are only visible during this initial creation of the contract. Once you save it, either of these fields that have values entered in them will be visible to show those respective values, and any that had nothing entered will not display, and neither can be edited after that initial save. Item Search & Line Items - You can Search for and add the item or multiple items for the Rental Contract here. You can rent as many items as you like in a single contract. This area will display the Line Item(s) being rented in the same manner as the Register, including a thumbnail image. You can manually set the Price, if needed, the Quantity, and by clicking the Price Tag icon in the Discount column, you can set a Line-Item Discount by percentage off or dollar-amount off, as needed. Payment Details - This section displays the base amount for the Monthly Rental Payment, with the interest rate already combined, if any. It will also populate your Monthly Maintenance and Monthly Insurance fee amounts. All three of those fields can be edited, if you need. Please Note: After you create this initial contract and save it, you will not be able to edit these fields any longer, so make sure they are set correctly. If you save a contract with incorrect numbers, you will need to delete it (go to Modules > Rental Contracts > click on the contract ID Number, find the Delete button near the bottom of the panel and click it), and then re-create the contract with the correct information. Payments - This area shows how many payments are scheduled and how much each payment needs to be. If you click on Scheduled Payments you'll see a schedule like this one: In addition to the payment breakdown displayed in the Payment Schedule, you can also click on Next Payment Amount to see a breakdown of the components of just the monthly payment, like this (Estimated Tax not shown in this example): Auto Pay - If you want the system to automatically bill the customer each period, set this to ON. You can also click to Add Primary Card and Add Secondary Card (in case the primary fails for whatever reason). A Secondary Card is not required by our system. Please note that the Credit Card Automated Settings to retry failed card charges in the Settings for Rental Contracts will not work if this setting isn't ON. Here is the interface for adding a card: If the Primary Card should fail, the Secondary is charged, and no extra fees are charged to the customer. If you plan to allow the customer to mail in checks or make payments in person or by phone, you can set this to OFF. Summary - Once all of the fields in the Add Rental Contract panel have been filled in, the Total Financed and the Due Today fields will be populated with their final amounts. Special Functions - Upload Signed (Contract) - If you wish to use pre-printed contracts, after you have clicked the Collect Signature button and printed off one of your contract templates, you can scan or photograph them, then click this button to upload them to Like Sew cloud for secure storage. Print - If you wish to print out the dynamic contract you configure in the Rent to Own Settings area for signature, all fields you entered in that form contract will be auto-filled with the terms you have entered in this panel. You can have the customer initial and sign, then you can either scan the document or photograph it and then it can be uploaded to Like Sew cloud for secure storage. You can also click the button to Collect Signature to load one of your pre-saved contract templates. Please note, this will require an integrated processing terminal that allows on-screen signatures. If you do not do integrated processing with Like Sew Payments, you will need to use the Upload Signed function. Once you have completed all steps, click the Save button to finalize the contract. PLEASE NOTE: Most of the fields that are editable in this contract creation panel will be set in stone after this save, so make sure all of your information is correct before you save the contract! If you have incorrect information in any of the areas noted above that are not editable after the save, you will need to delete this contract and recreate it with the correct information. To delete it, go to Modules > Rental Contracts > click on the contract ID Number, find the Delete button near the bottom of the panel and click it, and then re-create the contract with the correct information using the steps detailed above. A Note on Tax Please Note: The following does NOT constitute official advice from MusicShop360 on how to process your taxes. It is simply information you as a business owner should be aware of regarding best practices typically recommended by tax consultant groups familiar with the Rental Contract/Rental industry. It may seem logical to include taxes in the total listed in your contracts, but this may not be the best approach. Consider the following scenario: A shop owner creates rental contracts with a school for 100 band instruments for a term of 36 months. Included in the contract were the taxes, which at the time of signing were 6.5% for the area. A year into the contract, the state legislature increases the state tax to 8.5%. The owner is now liable to pay the additional tax amount for all items, and any similar contracts, entirely out-of-pocket throughout the rest of the terms. If the owner attempts to increase the monthly payments, he or she will be in breach of contract. With this scenario in mind, you may wish to adjust your contracts to list pre-tax totals for payment amounts. In this way, the fluctuations of your tax rates will not affect your contracts in any way. Initial Checkout If an initial or down payment is being made, you will be taken back to the Register where the Customer and a line item for the first Rental Contract payment will be loaded. Please Note: that since you do all applicable Discounts when creating the Rental Contract, you do NOT have the option of discounting the individual payments in the Register. Global Transaction Discounts (with the % button on the right in the Discount line) and Customer Discounts will not override this. You CAN, however, manually change the Amount field, if needed. The Tax is already figured into the base amount for the Payment, so you will not see tax applied to this transaction. Here is how a completed payment will show up on the customer's receipt: Modules rental contracts}', 31='{type=number, value=0}'}, {id=191604258609, createdAt=1750439292612, updatedAt=1769704331445, path='rain-payments-restricted-businesses', name='Integrated Payments: Restricted Businesses', 2='{type=string, value=http://rainpos.my.site.com/s/article/Like Sew-Payments-Restricted-Businesses}', 4='{type=list, value=[{id=1, name='rain_pos', order=0, label='Rain POS'}, {id=2, name='like_sew', order=1, label='Like Sew'}, {id=3, name='jewel360', order=2, label='Jewel360'}, {id=4, name='music_shop_360', order=3, label='Music Shop 360'}]}', 6='{type=string, value=
The following categories of businesses and business practices are restricted from using Like Sew Payments. In certain cases, businesses listed below may be eligible for processing with explicit prior approval from Like Sew. Note, however, that businesses that offer illegal products or services are never eligible to use the Like Sew Services. If you are uncertain as to whether your business is a Restricted Business, or have questions about how these requirements apply to you, please contact us at payments@rainpos.com.
Investment & Credit Services
Securities brokers; mortgage consulting or debt reduction services; credit counseling or repair; investment services; real estate opportunities; lending instruments.
Money and Legal Services
Financial institutions, money transmitters and money services businesses, check cashing, wire transfers, money orders; currency exchanges or dealers; bill-pay services; crowdfunding; insurance; bail bonds; collections agencies; law firms collecting funds for any purpose other than to pay fees owed to the firm for services provided by the firm (e.g., firms cannot use Stripe to hold client funds, collection or settlement amounts, disputed funds, etc.).
Virtual Currency or Stored Value
Virtual currency that can be monetized, resold, or converted to physical or digital products and services or otherwise exit the virtual world (e.g., Bitcoin); cryptocurrency mining equipment; initial coin offerings; digital wallets, sale of stored value or credits maintained, accepted and issued by anyone other than the seller.
Intellectual Property or Proprietary Rights-Infringement
Sales, distribution, or access to counterfeit music, movies, software, or other licensed materials without the appropriate authorization from the rights holder; any product or service that directly infringes or facilitates infringement upon the trademark, patent, copyright, trade secrets, or proprietary or privacy rights of any third party; use of Stripe intellectual property without prior written consent from Stripe; use of the Stripe name or logo including use of Stripe trade or service marks inconsistent with the Stripe Marks Usage Agreement, or in a manner that otherwise harms Stripe or the Stripe brand; any action that implies an untrue endorsement by or affiliation with Stripe.
Counterfeit or Unauthorized Goods
Counterfeit goods; unauthorized sale or resale of brand name or designer products or services; sale of goods or services that are illegally imported or exported.
Gambling
Lotteries; bidding fee auctions; sports forecasting or odds making for a monetary or material prize; fantasy sports leagues with cash prizes; internet gaming; contests; sweepstakes; games of chance including legal or illegal forms of gambling, internet gambling, sweepstakes and contests with a buy-in or cash prize; charity sweepstakes and raffles for the explicit purpose of fundraising.
Regulated or Illegal Products or Services
Cannabis dispensaries and related businesses; sale of tobacco, e-cigarettes, and e-liquid; online pharmacies; prescription-only products including card-not-present pharmaceuticals; peptides and research chemicals; fake references or ID-providing services; age restricted goods or services; weapons and munitions; gunpowder and other explosives; fireworks and related goods; toxic, flammable, and radioactive materials; products and services with varying legal status on a state-by-state basis; goods or services, the sale of which is illegal under applicable law in the jurisdictions to which your business is targeted or directed.
Adult Content and Services
Pornography and other obscene materials (including literature, imagery and other media) depicting nudity or explicitly sexual acts; sites offering any sexually-related services such as prostitution, escorts, pay-per view, adult live chat features; sexually oriented items (e.g., adult toys); adult video stores and sexually oriented massage parlors; gentleman's clubs, topless bars, and strip clubs; sexually oriented dating services.
Get Rich Quick Schemes
Investment opportunities or other services that promise high rewards.
Mug Shot Publication or Pay-to-Remove Sites
Platforms that facilitate the publication and removal of content (such as mug shots), where the primary purpose of posting such content is to cause or raise concerns of reputational harm.
No-Value-Added Services
Sale or resale of a service without added benefit to the buyer; resale of government offerings without authorization or added value; sites that we determine in our sole discretion to be unfair, deceptive, or predatory towards consumers.
Aggregation
Engaging in any form of licensed or unlicensed aggregation of funds owed to third parties, factoring, or other activities intended to obfuscate the origin of funds; payment facilitation.
Drug Paraphernalia
Any equipment designed for making or using drugs, such as bongs, vaporizers, and hookahs.
High-Risk Businesses
Bankruptcy lawyers; remote technical support; psychic services; essay mills; chain letters; door-to-door sales; medical benefit packages; telemedicine and telehealth services; travel reservation services and clubs; airlines; cruises; timeshares; circumvention, jamming and interference devices; prepaid phone cards, phone services; telemarketing, offering substantial rebates or special incentives as an inducement to purchase products or services; telecommunications manipulation equipment; forwarding brokers; negative response marketing; subscriptions over one year; extended warranties; government grants; embassy, foreign consultant, or other foreign governments; charities without proper registration; credit card and identity theft protection; the use of credit to pay for lending services; any businesses that we believe poses elevated financial risk, legal liability, or violates card network or bank policies; any business or organization that a. engages in, encourages, promotes or celebrates unlawful violence or physical harm to persons or property, or b. engages in, encourages, promotes or celebrates unlawful violence toward any group based on race, religion, disability, gender, sexual orientation, national origin, or any other immutable characteristic.
Multi-Level Marketing
Pyramid schemes and multi-level marketing.
Pseudo-Pharmaceuticals
Nutraceuticals, pseudo-pharmaceuticals and other products that make health claims that have not been approved or verified by the applicable local and/or national regulatory body.
Social Media Activity
Sale of Twitter followers, Facebook likes, YouTube views, and other forms of social media activity and online traffic.
Substances Designed to Mimic Illegal Drugs
Sale of a legal substance that provides the same effect as an illegal drug (e.g., salvia, kratom).
Video Game or Virtual World Credits
Sale of in-game currency or game items, unless the merchant is the operator of the virtual world.
Use of Stripe in a Manner Inconsistent with its Intended Use or as Expressly Prohibited in the Stripe Services Agreement
Use of Stripe principally as a virtual terminal (e.g., submitting card transactions by manually inputting card information); processing where there is no bona fide good or service sold, or donation accepted; card testing; evasion of card network chargeback monitoring programs; cross-border acquiring; sharing cardholder information with another merchant for payment cross-sell product or service.
}', 22='{type=option, value={id=3, name='faq', order=2, label='FAQ'}}', 9='{type=string, value=Integrated Payments: Restricted Businesses}', 25='{type=number, value=0}', 26='{type=list, value=[{id=190209692688, name='Getting Started'}, {id=190209692536, name='Admin'}]}', 28='{type=string, value=Integrated Payments: Restricted Businesses The following categories of businesses and business practices are restricted from using Like Sew Payments. In certain cases, businesses listed below may be eligible for processing with explicit prior approval from Like Sew. Note, however, that businesses that offer illegal products or services are never eligible to use the Like Sew Services. If you are uncertain as to whether your business is a Restricted Business, or have questions about how these requirements apply to you, please contact us at payments@rainpos.com. Investment & Credit Services Securities brokers; mortgage consulting or debt reduction services; credit counseling or repair; investment services; real estate opportunities; lending instruments. Money and Legal Services Financial institutions, money transmitters and money services businesses, check cashing, wire transfers, money orders; currency exchanges or dealers; bill-pay services; crowdfunding; insurance; bail bonds; collections agencies; law firms collecting funds for any purpose other than to pay fees owed to the firm for services provided by the firm (e.g., firms cannot use Stripe to hold client funds, collection or settlement amounts, disputed funds, etc.). Virtual Currency or Stored Value Virtual currency that can be monetized, resold, or converted to physical or digital products and services or otherwise exit the virtual world (e.g., Bitcoin); cryptocurrency mining equipment; initial coin offerings; digital wallets, sale of stored value or credits maintained, accepted and issued by anyone other than the seller. Intellectual Property or Proprietary Rights-Infringement Sales, distribution, or access to counterfeit music, movies, software, or other licensed materials without the appropriate authorization from the rights holder; any product or service that directly infringes or facilitates infringement upon the trademark, patent, copyright, trade secrets, or proprietary or privacy rights of any third party; use of Stripe intellectual property without prior written consent from Stripe; use of the Stripe name or logo including use of Stripe trade or service marks inconsistent with the Stripe Marks Usage Agreement, or in a manner that otherwise harms Stripe or the Stripe brand; any action that implies an untrue endorsement by or affiliation with Stripe. Counterfeit or Unauthorized Goods Counterfeit goods; unauthorized sale or resale of brand name or designer products or services; sale of goods or services that are illegally imported or exported. Gambling Lotteries; bidding fee auctions; sports forecasting or odds making for a monetary or material prize; fantasy sports leagues with cash prizes; internet gaming; contests; sweepstakes; games of chance including legal or illegal forms of gambling, internet gambling, sweepstakes and contests with a buy-in or cash prize; charity sweepstakes and raffles for the explicit purpose of fundraising. Regulated or Illegal Products or Services Cannabis dispensaries and related businesses; sale of tobacco, e-cigarettes, and e-liquid; online pharmacies; prescription-only products including card-not-present pharmaceuticals; peptides and research chemicals; fake references or ID-providing services; age restricted goods or services; weapons and munitions; gunpowder and other explosives; fireworks and related goods; toxic, flammable, and radioactive materials; products and services with varying legal status on a state-by-state basis; goods or services, the sale of which is illegal under applicable law in the jurisdictions to which your business is targeted or directed. Adult Content and Services Pornography and other obscene materials (including literature, imagery and other media) depicting nudity or explicitly sexual acts; sites offering any sexually-related services such as prostitution, escorts, pay-per view, adult live chat features; sexually oriented items (e.g., adult toys); adult video stores and sexually oriented massage parlors; gentleman's clubs, topless bars, and strip clubs; sexually oriented dating services. Get Rich Quick Schemes Investment opportunities or other services that promise high rewards. Mug Shot Publication or Pay-to-Remove Sites Platforms that facilitate the publication and removal of content (such as mug shots), where the primary purpose of posting such content is to cause or raise concerns of reputational harm. No-Value-Added Services Sale or resale of a service without added benefit to the buyer; resale of government offerings without authorization or added value; sites that we determine in our sole discretion to be unfair, deceptive, or predatory towards consumers. Aggregation Engaging in any form of licensed or unlicensed aggregation of funds owed to third parties, factoring, or other activities intended to obfuscate the origin of funds; payment facilitation. Drug Paraphernalia Any equipment designed for making or using drugs, such as bongs, vaporizers, and hookahs. High-Risk Businesses Bankruptcy lawyers; remote technical support; psychic services; essay mills; chain letters; door-to-door sales; medical benefit packages; telemedicine and telehealth services; travel reservation services and clubs; airlines; cruises; timeshares; circumvention, jamming and interference devices; prepaid phone cards, phone services; telemarketing, offering substantial rebates or special incentives as an inducement to purchase products or services; telecommunications manipulation equipment; forwarding brokers; negative response marketing; subscriptions over one year; extended warranties; government grants; embassy, foreign consultant, or other foreign governments; charities without proper registration; credit card and identity theft protection; the use of credit to pay for lending services; any businesses that we believe poses elevated financial risk, legal liability, or violates card network or bank policies; any business or organization that a. engages in, encourages, promotes or celebrates unlawful violence or physical harm to persons or property, or b. engages in, encourages, promotes or celebrates unlawful violence toward any group based on race, religion, disability, gender, sexual orientation, national origin, or any other immutable characteristic. Multi-Level Marketing Pyramid schemes and multi-level marketing. Pseudo-Pharmaceuticals Nutraceuticals, pseudo-pharmaceuticals and other products that make health claims that have not been approved or verified by the applicable local and/or national regulatory body. Social Media Activity Sale of Twitter followers, Facebook likes, YouTube views, and other forms of social media activity and online traffic. Substances Designed to Mimic Illegal Drugs Sale of a legal substance that provides the same effect as an illegal drug (e.g., salvia, kratom). Video Game or Virtual World Credits Sale of in-game currency or game items, unless the merchant is the operator of the virtual world. Use of Stripe in a Manner Inconsistent with its Intended Use or as Expressly Prohibited in the Stripe Services Agreement Use of Stripe principally as a virtual terminal (e.g., submitting card transactions by manually inputting card information); processing where there is no bona fide good or service sold, or donation accepted; card testing; evasion of card network chargeback monitoring programs; cross-border acquiring; sharing cardholder information with another merchant for payment cross-sell product or service. Getting Started / Help payment processing}'}, {id=191604258612, createdAt=1750439292615, updatedAt=1769704329516, path='rental-contracts', name='Rental Contracts', 2='{type=string, value=http://rainpos.my.site.com/s/article/Rental-Contracts}', 4='{type=list, value=[{id=4, name='music_shop_360', order=3, label='Music Shop 360'}]}', 6='{type=string, value=
You can begin setting up a Rental Contract by clicking on the Register Button or you can use the +Create New button. You can configure your Rental Contract settings by clicking the Admin Button with your username in the upper right and going to Settings > POS Settings > Rental Contracts. Click here for more information on how to set up Rental Contracts (links in this article will open in a new browser tab for you): Point of Sale Settings: Rental Contracts
Please Note: If you want to use Autopay to automatically bill your customers' credit cards each month, you will need to use the integrated processing with Like Sew Payments.
Creating a Rental Contract from the Register
- Once your settings have been configured, go to your Register (the fastest way to get to your Register is by clicking on the Register Button on the far left side of the blue Admin Toolbar).
- Load the Customer (or create a new Customer in the system, make sure they are saved to your Customer list before you proceed).
- On the far right side of the Register, click on any of the Customer Action icons. If the Customer already has a Rent to Own contract saved in the system, you will see the handshake icon highlighted in gold.
- Find the section for Rental Contracts in your Customer Actions panel and click the + button to start your new contract. Please note that from this area, you can also click the Pay button on an existing Rental Contract listed for the customer.
You are now ready to configure your initial contract for this Rental Contract. When you click the + button, the Add Rental Contract panel will open.
Creating a Rental Contract from the +Create New Button
From anywhere in the system, you can click the +Create New button and start a new Rental Contract.
You'll be asked to load or create the Customer for the new contract. You can search for customers already in the system. You can c lick the customer's name to view full details (the link will open in a new browser tab so you don't lose your place) or if you have the right one, just click anywhere in the customer's info bar to select them. If you have multiple Locations saved in the system, you can also choose the Location at which the rental contract will be fulfilled and serviced. Once you have everything set, click Next at the bottom.
Configuring New Rental Contracts
Please note that if you start the contract from the Register, you'll remain in the Register for the steps below. If you create the contract using the +Create New button, you'll be taken to the Rental Contracts list page where you'll configure the contract, then once you're ready to save it, you'll go to the Register to take the initial payment.
Here are the areas of a new Rental Contract you can configure:
-
Rental Information - Key details about the Customer as well as the name of the Store Location where the Rent to Own contract is being created will be listed here. Clicking on the links to the highlighted items here (in this example, Customer Name and Phone) will open the Customer detail panel so you can access their full info. Please note that you will also be able to access this panel whenever you click to open an active Rental Contract, either from the Register or from Modules > Rental Contracts.
Please Note: If you are in the Music industry, you will see fields for School information, as pictured above. All other industries will not have those fields enabled. If you need to set up your School District information, click here to learn how: Point of Sale Settings: Rental Contracts
-
Contract Details- You can set the Contract Type to be Rent to Own or Rent Only (rent to rent). For the Payment Frequency, you can set it to be Monthly, Quarterly, or Yearly. In the Term area, you can set the total Number of Months, Years, or Weeks. You can also set your Interest Rate here. NOTE: These fields, once the contract is initially saved, will also become un-editable, so make sure you get the info in the way you will want it from the start. Read the note above on how to delete the contract if you saved the info the wrong way.
-
Total Financed - This section details the total amount the customer is financing, the tax, and gives you fields to enter any Rental Credit that may apply or Down Payment that will reduce the total. You can also add a Security Deposit if you need to take one. This deposit is one that will be returned to the customer after the rental is complete, if everything goes well with the item. Please note that these fields are only editable during this initial creation of the contract. Once you save it, these fields that have values entered in them will be visible to show those respective values, and any that had nothing entered will not display, and neither can be edited after that initial save.
-
Item Search - You can Search for and add the item or multiple items for the Rental Contract here. You can rent as many items as you like in a single contract.
-
Payment Details - This section displays the base amount for the Monthly Rental Payment, with the interest rate already combined, if any. It will also populate your Monthly Maintenance and/or Monthly Protection fee amounts. All three of those fields can be edited, if you need. NOTE: After you create this initial contract and save it, you will not be able to edit these fields any longer, so make sure they are set correctly. You can also set the Rental Payment to whatever amount you like and click the Lock icon if you want to ignore the automatic amount that populates there. Doing so will likely recalculate the total number of payments needed to pay off a Rent to Own contract, but will not affect a Rent Only contract in that way. If you save a contract with incorrect numbers, you will need to delete it (go to Modules > Rental Contracts > click on the Contract ID Number, find the Delete button near the bottom of the panel and click it), and then re-create the contract with the correct information.
-
Payments - This area shows how many payments are scheduled and how much each payment needs to be. If you click on Scheduled Payments you'll see a schedule like this one:
In addition to the payment breakdown displayed in the Payment Schedule, you can also click on Next Payment Amount to see a breakdown of the components of just the monthly payment, like this:
-
Auto Pay - If you want the system to automatically bill the customer each period, set this to ON. You can click the Manage link to work with cards already saved for the customer. You can also click to Add Primary Card to add one, and you can Add Secondary Card (in case the primary fails for whatever reason). A Secondary Card is not required by our system. Please note that the Credit Card Automated Settings to retry failed card charges in the Settings for Rental Contracts will not work if this setting isn't ON. If the Primary Card should fail, the Secondary is charged, and no extra fees are charged to the customer. If you plan to allow the customer to mail in checks or make payments in person or by phone, you can set this to OFF.
-
Summary - Once all of the fields in the Add Rental Contract panel have been filled in, the Total Financed and the Due Today fields will be populated with their final amounts.
-
Fees- You can have Late Fees on or off in this area, and you can configure any Grace Period you might want to allow and how much to charge for the Late Fee Amount.
-
Rental Item(s) - This area will display the Line Item(s) being rented in the same manner as the Register, including a thumbnail image. You can click the Serial Number button if you haven't yet added that, or you can edit a number that's been added. You can manually set the Price, if needed, the Quantity, and by clicking the Price Tag icon in the Discount column, you can set a Line-Item Discount by percentage off or dollar-amount off, as needed.
-
Contract Functions - Rental Contracts have several features with buttons at the bottom of which you should be aware:
Upload Signed (Contract) - If you wish to use pre-printed contracts, after you have clicked the Collect Signature button and printed off one of your contract templates, you can scan or photograph them, then click this button to upload them to the Rain system cloud for secure storage.
Print - If you wish to print out the dynamic contract you configure in the Rent to Own Settings area for signature, all fields you entered in that form contract will be auto-filled with the terms you have entered in this panel. You can have the customer initial and sign, then you can either scan the document or photograph it and then it can be uploaded to the Rain system cloud for secure storage. You can also click the button to Collect Signature to load one of your pre-saved contract templates. Please note, this will require an integrated processing terminal that allows on-screen signatures, currently only provided by Worldpay. If you do not do integrated processing with Worldpay, you will need to use the Upload Signed function.
Once you have completed all steps, click the Save button to finalize the contract.
Please Note: Most of the fields that are editable in this contract creation panel will be permanently set after this save, so make sure all of your information is correct before you save the contract!
If you have incorrect information in any of the areas noted above that are not editable after the save, you will need to delete this contract and recreate it with the correct information. To delete it, go to Modules > Rental Contracts > click on the Contract ID Number, find the Delete button near the bottom of the panel and click it, and then re-create the contract with the correct information using the steps detailed above.
Initial Checkout
Whether or not an initial or down payment is being made, you will be taken back to the Register where the Customer and a line item for the Rental Contract will be loaded. If the customer owes nothing today, the line item will still be there so a receipt can be given to the customer to document the start of the contract.
Please note that since you do all applicable Discounts when creating the Rental Contract, you do NOT have the option of discounting the individual payments in the Register. Global Transaction Discounts (with the % button on the right in the Discount line) and Customer Discounts will not override this. You CAN, however, manually change the Amount field, if needed.
Click here to learn more about working with Rental Contracts: Maintaining and Completing Rental Contracts
}', 22='{type=option, value={id=1, name='featured_content', order=0, label='Featured Content'}}', 9='{type=string, value=Rental Contracts}', 25='{type=number, value=0}', 26='{type=list, value=[{id=190209692541, name='Register'}, {id=190209692542, name='Modules'}]}', 28='{type=string, value=Rental Contracts You can begin setting up a Rental Contract by clicking on the Register Button or you can use the +Create New button. You can configure your Rental Contract settings by clicking the Admin Button with your username in the upper right and going to Settings > POS Settings > Rental Contracts. Click here for more information on how to set up Rental Contracts (links in this article will open in a new browser tab for you): Point of Sale Settings: Rental Contracts Please Note: If you want to use Autopay to automatically bill your customers' credit cards each month, you will need to use the integrated processing with Like Sew Payments. Creating a Rental Contract from the Register Once your settings have been configured, go to your Register (the fastest way to get to your Register is by clicking on the Register Button on the far left side of the blue Admin Toolbar). Load the Customer (or create a new Customer in the system, make sure they are saved to your Customer list before you proceed). On the far right side of the Register, click on any of the Customer Action icons. If the Customer already has a Rent to Own contract saved in the system, you will see the handshake icon highlighted in gold. Find the section for Rental Contracts in your Customer Actions panel and click the + button to start your new contract. Please note that from this area, you can also click the Pay button on an existing Rental Contract listed for the customer. You are now ready to configure your initial contract for this Rental Contract. When you click the + button, the Add Rental Contract panel will open. Creating a Rental Contract from the +Create New Button From anywhere in the system, you can click the +Create New button and start a new Rental Contract. You'll be asked to load or create the Customer for the new contract. You can search for customers already in the system. You can c lick the customer's name to view full details (the link will open in a new browser tab so you don't lose your place) or if you have the right one, just click anywhere in the customer's info bar to select them. If you have multiple Locations saved in the system, you can also choose the Location at which the rental contract will be fulfilled and serviced. Once you have everything set, click Next at the bottom. Configuring New Rental Contracts Please note that if you start the contract from the Register, you'll remain in the Register for the steps below. If you create the contract using the +Create New button, you'll be taken to the Rental Contracts list page where you'll configure the contract, then once you're ready to save it, you'll go to the Register to take the initial payment. Here are the areas of a new Rental Contract you can configure: Rental Information - Key details about the Customer as well as the name of the Store Location where the Rent to Own contract is being created will be listed here. Clicking on the links to the highlighted items here (in this example, Customer Name and Phone) will open the Customer detail panel so you can access their full info. Please note that you will also be able to access this panel whenever you click to open an active Rental Contract, either from the Register or from Modules > Rental Contracts. Please Note: If you are in the Music industry, you will see fields for School information, as pictured above. All other industries will not have those fields enabled. If you need to set up your School District information, click here to learn how: Point of Sale Settings: Rental Contracts Contract Details- You can set the Contract Type to be Rent to Own or Rent Only (rent to rent). For the Payment Frequency, you can set it to be Monthly, Quarterly, or Yearly. In the Term area, you can set the total Number of Months, Years, or Weeks. You can also set your Interest Rate here. NOTE: These fields, once the contract is initially saved, will also become un-editable, so make sure you get the info in the way you will want it from the start. Read the note above on how to delete the contract if you saved the info the wrong way. Total Financed - This section details the total amount the customer is financing, the tax, and gives you fields to enter any Rental Credit that may apply or Down Payment that will reduce the total. You can also add a Security Deposit if you need to take one. This deposit is one that will be returned to the customer after the rental is complete, if everything goes well with the item. Please note that these fields are only editable during this initial creation of the contract. Once you save it, these fields that have values entered in them will be visible to show those respective values, and any that had nothing entered will not display, and neither can be edited after that initial save. Item Search - You can Search for and add the item or multiple items for the Rental Contract here. You can rent as many items as you like in a single contract. Payment Details - This section displays the base amount for the Monthly Rental Payment, with the interest rate already combined, if any. It will also populate your Monthly Maintenance and/or Monthly Protection fee amounts. All three of those fields can be edited, if you need. NOTE: After you create this initial contract and save it, you will not be able to edit these fields any longer, so make sure they are set correctly. You can also set the Rental Payment to whatever amount you like and click the Lock icon if you want to ignore the automatic amount that populates there. Doing so will likely recalculate the total number of payments needed to pay off a Rent to Own contract, but will not affect a Rent Only contract in that way. If you save a contract with incorrect numbers, you will need to delete it (go to Modules > Rental Contracts > click on the Contract ID Number, find the Delete button near the bottom of the panel and click it), and then re-create the contract with the correct information. Payments - This area shows how many payments are scheduled and how much each payment needs to be. If you click on Scheduled Payments you'll see a schedule like this one: In addition to the payment breakdown displayed in the Payment Schedule, you can also click on Next Payment Amount to see a breakdown of the components of just the monthly payment, like this: Auto Pay - If you want the system to automatically bill the customer each period, set this to ON. You can click the Manage link to work with cards already saved for the customer. You can also click to Add Primary Card to add one, and you can Add Secondary Card (in case the primary fails for whatever reason). A Secondary Card is not required by our system. Please note that the Credit Card Automated Settings to retry failed card charges in the Settings for Rental Contracts will not work if this setting isn't ON. If the Primary Card should fail, the Secondary is charged, and no extra fees are charged to the customer. If you plan to allow the customer to mail in checks or make payments in person or by phone, you can set this to OFF. Summary - Once all of the fields in the Add Rental Contract panel have been filled in, the Total Financed and the Due Today fields will be populated with their final amounts. Fees- You can have Late Fees on or off in this area, and you can configure any Grace Period you might want to allow and how much to charge for the Late Fee Amount. Rental Item(s) - This area will display the Line Item(s) being rented in the same manner as the Register, including a thumbnail image. You can click the Serial Number button if you haven't yet added that, or you can edit a number that's been added. You can manually set the Price, if needed, the Quantity, and by clicking the Price Tag icon in the Discount column, you can set a Line-Item Discount by percentage off or dollar-amount off, as needed. Contract Functions - Rental Contracts have several features with buttons at the bottom of which you should be aware: Upload Signed (Contract) - If you wish to use pre-printed contracts, after you have clicked the Collect Signature button and printed off one of your contract templates, you can scan or photograph them, then click this button to upload them to the Rain system cloud for secure storage. Print - If you wish to print out the dynamic contract you configure in the Rent to Own Settings area for signature, all fields you entered in that form contract will be auto-filled with the terms you have entered in this panel. You can have the customer initial and sign, then you can either scan the document or photograph it and then it can be uploaded to the Rain system cloud for secure storage. You can also click the button to Collect Signature to load one of your pre-saved contract templates. Please note, this will require an integrated processing terminal that allows on-screen signatures, currently only provided by Worldpay. If you do not do integrated processing with Worldpay, you will need to use the Upload Signed function. Once you have completed all steps, click the Save button to finalize the contract. Please Note: Most of the fields that are editable in this contract creation panel will be permanently set after this save, so make sure all of your information is correct before you save the contract! If you have incorrect information in any of the areas noted above that are not editable after the save, you will need to delete this contract and recreate it with the correct information. To delete it, go to Modules > Rental Contracts > click on the Contract ID Number, find the Delete button near the bottom of the panel and click it, and then re-create the contract with the correct information using the steps detailed above. Initial Checkout Whether or not an initial or down payment is being made, you will be taken back to the Register where the Customer and a line item for the Rental Contract will be loaded. If the customer owes nothing today, the line item will still be there so a receipt can be given to the customer to document the start of the contract. Please note that since you do all applicable Discounts when creating the Rental Contract, you do NOT have the option of discounting the individual payments in the Register. Global Transaction Discounts (with the % button on the right in the Discount line) and Customer Discounts will not override this. You CAN, however, manually change the Amount field, if needed. Click here to learn more about working with Rental Contracts: Maintaining and Completing Rental Contracts Register,Modules rental contracts}'}, {id=191604258880, createdAt=1750439292813, updatedAt=1789491799716, path='manually-enter-a-credit-card-number', name='Manually Enter a Credit Card Number', 32='{type=number, value=1}', 2='{type=string, value=https://rainpos.my.site.com/s/article/Manually-Enter-a-Credit-Card-Number}', 4='{type=list, value=[{id=1, name='rain_pos', order=0, label='Rain POS'}, {id=2, name='like_sew', order=1, label='Like Sew'}, {id=3, name='jewel360', order=2, label='Jewel360'}, {id=4, name='music_shop_360', order=3, label='Music Shop 360'}]}', 6='{type=string, value=
Manual Card Entry - Ingenico iSMP4
If you need to process a transaction and don't have the card at hand, as in a phone order, from the Register you'll proceed as if you're doing a normal Card payment method, send the amount over to the terminal by clicking the Pay button, but on the terminal click the red X button once, and it will prompt you to manually enter the card info. Be careful not to click it twice, as the second click will cancel everything out and you'll have to start over.
Manual Card Entry for Ingenico iSMP4
To manually process payments with your Ingenico iSMP4 device, follow the steps below:
1. Navigate to the sell screen and process the sale as normal.
2. When presented with your payment options, select Worldpay triPOS.
3. Vend will connect to your payment terminal.
4 Select F1 on your terminal to Enter Card for manual entry.
5. Follow the instructions on the terminal. First, enter your customer's credit card number and press the green enter button.
6. Next, enter the expiry date, and press the green enter button.
7. When the payment amount appears on the screen: Either select F3 to confirm or F4 to cancel the payment.
6. Your customer will then have to provide you with the zip code that is associated with the credit card account. Enter this into the terminal and press the green enter button.
7. The terminal will then return to the idle screen once the payment is successful.
}', 22='{type=option, value={id=2, name='recommended_extra', order=1, label='Recommended Extra'}}', 39='{type=number, value=0}', 40='{type=number, value=1}', 9='{type=string, value=Manually Enter a Credit Card Number}', 25='{type=number, value=0}', 26='{type=list, value=[{id=190209692541, name='Register'}, {id=190209692688, name='Getting Started'}]}', 28='{type=string, value=Manually Enter a Credit Card Number Manual Card Entry - Ingenico iSMP4 If you need to process a transaction and don't have the card at hand, as in a phone order, from the Register you'll proceed as if you're doing a normal Card payment method, send the amount over to the terminal by clicking the Pay button, but on the terminal click the red X button once, and it will prompt you to manually enter the card info. Be careful not to click it twice, as the second click will cancel everything out and you'll have to start over. Manual Card Entry for Ingenico iSMP4 To manually process payments with your Ingenico iSMP4 device, follow the steps below: 1. Navigate to the sell screen and process the sale as normal. 2. When presented with your payment options, select Worldpay triPOS. 3. Vend will connect to your payment terminal. 4 Select F1 on your terminal to Enter Card for manual entry. 5. Follow the instructions on the terminal. First, enter your customer's credit card number and press the green enter button. 6. Next, enter the expiry date, and press the green enter button. 7. When the payment amount appears on the screen: Either select F3 to confirm or F4 to cancel the payment. 6. Your customer will then have to provide you with the zip code that is associated with the credit card account. Enter this into the terminal and press the green enter button. 7. The terminal will then return to the idle screen once the payment is successful. Register,Getting Started / Help payment processing}', 31='{type=number, value=0}'}, {id=191604258903, createdAt=1750439292836, updatedAt=1753712801744, path='point-of-sale-introduction-launch-process', name='Point of Sale Introduction & Launch Process', 2='{type=string, value=https://rainpos.my.site.com/s/article/Point-of-Sale-Introduction-Launch-Process}', 4='{type=list, value=[{id=1, name='rain_pos', order=0, label='Rain POS'}, {id=2, name='like_sew', order=1, label='Like Sew'}, {id=3, name='jewel360', order=2, label='Jewel360'}, {id=4, name='music_shop_360', order=3, label='Music Shop 360'}]}', 6='{type=string, value=
The Point of Sale system, or POS, is like a virtual checkout stand for your physical store, complete with a register, a customer database with a rewards program, a product inventory system, a layaway system, and a work order service ticket system. Once it has been set up, you will be able to instantly access your database of customers, and your products will display in a very easily searchable manner as well. This system integrates flawlessly with your website, because they are truly one system; so when you ring up a sale in your POS, the inventory available on your website will be reduced in real-time.
To get you up and running, we follow a setup process outlined below.
POS Launch Process
-
Client Success Manager Collaboration - You have been assigned one of our Client Success Managers, and you can think of this person as your own personal concierge! Your Client Success Manager will be focused on making sure your system launch goes off without a hitch, and will be available to answer your questions, help you set up your hardware, and keep you informed every step of the way until you are up and running. You'll have an initial Consultation call to start all of this rolling, and prior to that call, you will need to fill out a questionnaire to give your Account Manager your preferences and information for startup. If you haven't received the questionnaire link already in your email, it will be arriving soon!
-
Data Migration - If you are moving over from an existing POS system, it is likely we will be able to migrate your data. Your Client Success Manager will Coordinate with the Migration team and get you on track for migration. Typically, we will do an initial migration that will bring over your product data so you can see how it is used by Like Sew. Any new inventory you get you will want to enter into Like Sew while you are in the onboarding process, and we will be teaching you how to do this (see below). Just before you go live and begin using Like Sew for your in-store transactions, your migration specialist will do a final migration that will update the quantities of your products.
-
System Training - One of our training specialists will guide you through how to use the parts of Like Sew that you will need. You will be able to share screens so you can see what is happening, you can try it yourself, and you can ask questions all along the way.
-
POS Setup - You can begin this setup process as soon as you have your login information, and we have guided WalkMe tutorials as well as extensive articles to help you get up and running quickly.
-
Users - You will need to set up an Administrative User account for each of your employees who will be working with the POS if you wish to track which employee is using the Register for each of your transactions. You can also set up Groups with different levels of permission in the system. (For more info, click here: Set Up User Logins and Groups.)
-
Store Locations - If you have multiple stores, we will work with you to set up each location in the system after your initial Consultation call with your Account Manager.
-
Tills - We can work with you to set up each of the tills in each of your locations during the initial Consultation call, if you like. Till is a synonym for 'cash register' and is basically any unique device (e.g. computer or tablet) or purchasing mode (e.g. tax exempt, trade show) you might need for the way you do business. Tills are something we will set up for you, and you are allowed up to 2 Tills in your setup, additional Tills are available for a fee, and you Client Success Manager has the details for you.
-
Equipment - We will discuss with you what equipment will be best for your needs, if you like. One thing that is unique about our system is that we do not require a certain type of scanner or printer to work with: we are much more flexible than other POS solution currently available. A good basic guideline to follow is that if you can set up and work with a scanner, printer, cash drawer, and card-processing terminal with your computer, the hardware will almost certainly work with our system because the POS runs in a browser. The only exception to this is credit-card processing terminals that some processors require, and your Client Success Manager will let you know what is needed in your case. The easiest hardware to set up utilizes the USB interface with its 'plug and play' ease of use.
-
System Settings - Your Client Success Manager will also work with you on setting up some miscellaneous settings for your POS. You can get to your POS settings by clicking on Settings (under the admin button with your username in the upper right). Click on the POS Settings tab. Click here for a more detailed look at your options for settings: Point of Sale Settings: General Tab.
-
-
Card Processing - Your POS will either use Like Sew Payments—an integrated processing solution with highly competitive rates—or a third-party merchant gateway that you already use or prefer, such as your bank. If you use Like Sew Payments, the processing will be integrated with our system, so voids and returns as well as the transaction processing will run right in the system on the screen. If you choose to use a third-party merchant, you can run your card transactions with hardware you already have for processing card payments, and then in the POS you will just enter the amounts and complete the transaction. In this solution, for things like returns and voids, you will also have to process those separately. Your Client Success Manager will have more information for you about your options.
-
Store Setup - There are several areas of the system that will need to be set up before you can begin using the POS. This is work that you can do on your own, or you can have us migrate the information (in some cases). Here is what is needed for your store setup, in the order it should be entered:
- Vendors - You will want to have the vendors and distributors you order from in the system from the start so they can be associated with the products to make Purchase Orders and Receiving Orders. We can migrate this information for you if you have your Vendor information in spreadsheet form, or you can enter it yourself from Inventory > Vendors. Your Account Manager can also help you set up Integration with some of them (we're adding more all the time!) so you can integrate your vendor orders with Like Sew. Click here to learn more about setting up your Vendors: Vendor Setup and Integration.
- Departments - If you have your Department information in spreadsheet form, we can migrate that data into our system and do all of that setup for you. If you don't have it in a spreadsheet, you will need to set it up before your product data can be added. In Like Sew, your Departments are the broadest possible groupings of your products, and are mainly used to view sales report information for the major sections of your store. You can go to Products > Departments and begin setting up the different Departments of your store. The system will track sales by department for products that have been added to a department. In many cases, one department might encompass several of your Categories in your Products module. For example, you might have categories for Fishing, Camping, and Hunting products, and a Department in your store for Outdoors that encompasses all three of those product areas. If you already use a POS system, it is probably best to keep your Departments set up the same way as you have them in that system. Departments are necessary if you want to get the best results from your financial reports from the system. Click here to learn more about how to set up your Departments: Product Departments - Create and Work With Your Departments.
- Categories - If you have your Categories in spreadsheet form, we can migrate that data into the system for you. If you don't have them in a spreadsheet, you'll need to set them up before we can begin adding products to the system. In Like Sew, Categories are ways you can organize your products into small, logical groups that are useful for viewing on a website or seeing detailed information in your sales reports. You can go into your Products > Categories and begin setting up your Categories, if you have not already done so. If you haven't yet organized them, it is a good idea to write these out on paper, complete with your sub-categories, before you create them in the system, so that you will have a better idea of how they should be arranged. Categories are necessary if you will be selling your products on the web, and even if you won't be doing that, Categories are very useful for logically organizing your products into smaller, more specific groups for more focused reporting as well as managing sale prices and other bulk activities. Click here to learn more about setting up your Categories: Create and Organize Categories.
- Products - Whether you have a current POS system or you are starting from scratch, your products can be loaded very quickly into the system with a spreadsheet upload. You will need to provide your product data spreadsheets to our Migration team so they can load the data for you, and your Account Manager will make sure you're in communication with your Migration expert for this process. For this to work, we either need to have already migrated your Vendors, Categories and Departments, or you need to have already set them up in the system. Many of our clients will do this themselves, setting up part of their inventory in the system and adding products as they go. Others do not have accurate information in their old POS and wish to start over from scratch. Still others have their old POS set up accurately and will just migrate the information over into our system. In any case, this is work that you can do yourself with some instruction from our support team, or you can have us do it for you with our Migration team. Click here for more information on how to add Products to your system: Product Page 3.0 Part 1 - Overview.
- Classes - If you have your class data in spreadsheet form, our migration team can load them all into the system for you. If not, you will need to set them up. Your Classes can be set up by entering the information exactly as you have done for your website into the Classes module, and the classes will integrate seamlessly with our Calendar system. Your Account Manager can answer any of your how-to questions on setting up this part of the system. Click here for more information on how to set up your Classes: Classes.
- Customers - If you currently have a database of customer information, we can migrate this for you. You can do this work yourself, or you can have us do it for you if you have a spreadsheet of your customers. This part of the system can track things like reward points and outstanding gift cards / certificates as well as full transaction history and customer information. Click here for more information on how to add your Customers to Like Sew: Adding and Editing Customers.
-
Launch Preparation - To prepare you for the launch of your POS, we will do the following:
-
Enter New Products - For inventory you receive during this startup phase (inventory you receive after you've sent our Migration team your product data spreadsheet), you need to enter those products into the system. This is a great chance to learn how to enter your products either in the Product module or by doing a Purchase Order / Receiving Order process. YOUR FINAL DATA SYNC WILL ONLY BE AN UPDATE OF YOUR INVENTORY QUANTITIES, so you need to begin entering new products right away.
-
Don't Change Product Titles or ID Codes - Later on in the process when we do your final data sync, we will refer to the titles and product ID codes (UPC, Manufacturer ID, SKU) in order to update your inventory quantities. If you change a product title or ID, that update won't happen for that product!
-
Training - As we mentioned before, you and your team have access to all of the resources of this support site, and in addition to your training calls from your Trainer, your Client Success Manager is available by email or phone and will answer any questions you may have. We will also be happy to show you how to use any part of the system you might want to explore.
-
Data Migration - If we are migrating your POS data, we will do an initial migration of the data it is possible to migrate (your Client Success Manager will have more information for you on what can and cannot be migrated) so you can review it and see how it displays and is used in our system. This will actually happen fairly early in this process so you have time to work with the data and make sure it came over correctly. You will need to keep to the following guidelines to make sure your total migration process works as well as possible:
- Testing - We will work with you to do final testing on your setup of the system, making sure that each kind of transaction works with your hardware properly in each location and till. You will work with your Account Manager on setting a date for your launch.
- Launch! - At this point we will plan with you your final Data Sync just prior to your launch day so we can have the latest possible product quantity data (no other data is updated!), after which you will be ready to begin using your new POS in your store(s).
-
-
Support - From this point forward, your Client Success Manager, Trainer, and Migration Specialist will focus on other clients and you will work with our outstanding Support team, a team that boasts a 24 hour turn-around time on ticket responses and an over 90% satisfaction rating! As you work with the system, you can always call our Support team at 385-404-6200 with any questions or suggestions you may have and we will be happy to assist you. You can also open a support ticket by clicking the question-mark button in the upper right and clicking Contact Support.
}', 22='{type=option, value={id=2, name='recommended_extra', order=1, label='Recommended Extra'}}', 23='{type=list, value=[{id=1, name='featured_content', order=0, label='Featured Content'}]}', 24='{type=list, value=[{id=95, name='onboarding', order=94, label='Onboarding'}]}', 9='{type=string, value=Point of Sale Introduction & Launch Process}', 25='{type=number, value=0}', 26='{type=list, value=[{id=190209692688, name='Getting Started'}]}', 28='{type=string, value=Point of Sale Introduction & Launch Process The Point of Sale system, or POS, is like a virtual checkout stand for your physical store, complete with a register, a customer database with a rewards program, a product inventory system, a layaway system, and a work order service ticket system. Once it has been set up, you will be able to instantly access your database of customers, and your products will display in a very easily searchable manner as well. This system integrates flawlessly with your website, because they are truly one system; so when you ring up a sale in your POS, the inventory available on your website will be reduced in real-time. To get you up and running, we follow a setup process outlined below. POS Launch Process Client Success Manager Collaboration- You have been assigned one of our Client Success Managers, and you can think of this person as your own personal concierge! Your Client Success Manager will be focused on making sure your system launch goes off without a hitch, and will be available to answer your questions, help you set up your hardware, and keep you informed every step of the way until you are up and running. You'll have an initial Consultation call to start all of this rolling, and prior to that call, you will need to fill out a questionnaire to give your Account Manager your preferences and information for startup. If you haven't received the questionnaire link already in your email, it will be arriving soon! Data Migration - If you are moving over from an existing POS system, it is likely we will be able to migrate your data. Your Client Success Manager will Coordinate with the Migration team and get you on track for migration. Typically, we will do an initial migration that will bring over your product data so you can see how it is used by Like Sew. Any new inventory you get you will want to enter into Like Sew while you are in the onboarding process, and we will be teaching you how to do this (see below). Just before you go live and begin using Like Sew for your in-store transactions, your migration specialist will do a final migration that will update the quantities of your products. System Training - One of our training specialists will guide you through how to use the parts of Like Sew that you will need. You will be able to share screens so you can see what is happening, you can try it yourself, and you can ask questions all along the way. POS Setup - You can begin this setup process as soon as you have your login information, and we have guided WalkMe tutorials as well as extensive articles to help you get up and running quickly. Users - You will need to set up an Administrative User account for each of your employees who will be working with the POS if you wish to track which employee is using the Register for each of your transactions. You can also set up Groups with different levels of permission in the system. (For more info, click here: Set Up User Logins and Groups.) Store Locations - If you have multiple stores, we will work with you to set up each location in the system after your initial Consultation call with your Account Manager. Tills - We can work with you to set up each of the tills in each of your locations during the initial Consultation call, if you like. Till is a synonym for 'cash register' and is basically any unique device (e.g. computer or tablet) or purchasing mode (e.g. tax exempt, trade show) you might need for the way you do business. (Click here to learn how: General System Settings). Tills are something we will set up for you, and you are allowed up to 2 Tills in your setup, additional Tills are available for a fee, and you Client Success Manager has the details for you. Equipment - We will discuss with you what equipment will be best for your needs, if you like. One thing that is unique about our system is that we do not require a certain type of scanner or printer to work with: we are much more flexible than other POS solution currently available. A good basic guideline to follow is that if you can set up and work with a scanner, printer, cash drawer, and card-processing terminal with your computer, the hardware will almost certainly work with our system because the POS runs in a browser. The only exception to this is credit-card processing terminals that some processors require, and your Client Success Manager will let you know what is needed in your case. The easiest hardware to set up utilizes the USB interface with its 'plug and play' ease of use. System Settings - Your Client Success Manager will also work with you on setting up some miscellaneous settings for your POS. You can get to your POS settings by clicking on Settings (under the admin button with your username in the upper right). Click on the POS Settings tab. Click here for a more detailed look at your options for settings: Point of Sale Settings: General Tab. Card Processing - Your POS will either use Like Sew Payments—an integrated processing solution with highly competitive rates—or a third-party merchant gateway that you already use or prefer, such as your bank. If you use Like Sew Payments, the processing will be integrated with our system, so voids and returns as well as the transaction processing will run right in the system on the screen. If you choose to use a third-party merchant, you can run your card transactions with hardware you already have for processing card payments, and then in the POS you will just enter the amounts and complete the transaction. In this solution, for things like returns and voids, you will also have to process those separately. Your Client Success Manager will have more information for you about your options. Store Setup - There are several areas of the system that will need to be set up before you can begin using the POS. This is work that you can do on your own, or you can have us migrate the information (in some cases). Here is what is needed for your store setup, in the order it should be entered: Vendors - You will want to have the vendors and distributors you order from in the system from the start so they can be associated with the products to make Purchase Orders and Receiving Orders. We can migrate this information for you if you have your Vendor information in spreadsheet form, or you can enter it yourself from Inventory > Vendors. Your Account Manager can also help you set up Integration with some of them (we're adding more all the time!) so you can integrate your vendor orders with Like Sew. Click here to learn more about setting up your Vendors: Vendor Setup and Integration. Departments - If you have your Department information in spreadsheet form, we can migrate that data into our system and do all of that setup for you. If you don't have it in a spreadsheet, you will need to set it up before your product data can be added. In Like Sew, your Departments are the broadest possible groupings of your products, and are mainly used to view sales report information for the major sections of your store. You can go to Products > Departments and begin setting up the different Departments of your store. The system will track sales by department for products that have been added to a department. In many cases, one department might encompass several of your Categories in your Products module. For example, you might have categories for Fishing, Camping, and Hunting products, and a Department in your store for Outdoors that encompasses all three of those product areas. If you already use a POS system, it is probably best to keep your Departments set up the same way as you have them in that system. Departments are necessary if you want to get the best results from your financial reports from the system. Click here to learn more about how to set up your Departments: Product Departments - Create and Work With Your Departments. Categories - If you have your Categories in spreadsheet form, we can migrate that data into the system for you. If you don't have them in a spreadsheet, you'll need to set them up before we can begin adding products to the system. In Like Sew, Categories are ways you can organize your products into small, logical groups that are useful for viewing on a website or seeing detailed information in your sales reports. You can go into your Products > Categories and begin setting up your Categories, if you have not already done so. If you haven't yet organized them, it is a good idea to write these out on paper, complete with your sub-categories, before you create them in the system, so that you will have a better idea of how they should be arranged. Categories are necessary if you will be selling your products on the web, and even if you won't be doing that, Categories are very useful for logically organizing your products into smaller, more specific groups for more focused reporting as well as managing sale prices and other bulk activities. Click here to learn more about setting up your Categories: Create and Organize Categories. Products - Whether you have a current POS system or you are starting from scratch, your products can be loaded very quickly into the system with a spreadsheet upload. You will need to provide your product data spreadsheets to our Migration team so they can load the data for you, and your Account Manager will make sure you're in communication with your Migration expert for this process. For this to work, we either need to have already migrated your Vendors, Categories and Departments, or you need to have already set them up in the system. Many of our clients will do this themselves, setting up part of their inventory in the system and adding products as they go. Others do not have accurate information in their old POS and wish to start over from scratch. Still others have their old POS set up accurately and will just migrate the information over into our system. In any case, this is work that you can do yourself with some instruction from our support team, or you can have us do it for you with our Migration team. Click here for more information on how to add Products to your system: Create a Product 01 - Details Tab. Classes - If you have your class data in spreadsheet form, our migration team can load them all into the system for you. If not, you will need to set them up. Your Classes can be set up by entering the information exactly as you have done for your website into the Classes module, and the classes will integrate seamlessly with our Calendar system. Your Account Manager can answer any of your how-to questions on setting up this part of the system. Click here for more information on how to set up your Classes: Classes. Customers - If you currently have a database of customer information, we can migrate this for you. You can do this work yourself, or you can have us do it for you if you have a spreadsheet of your customers. This part of the system can track things like reward points and outstanding gift cards / certificates as well as full transaction history and customer information. Click here for more information on how to add your Customers to Like Sew: Adding and Editing Customers. Launch Preparation - To prepare you for the launch of your POS, we will do the following: Enter New Products - For inventory you receive during this startup phase (inventory you receive after you've sent our Migration team your product data spreadsheet), you need to enter those products into the system. This is a great chance to learn how to enter your products either in the Product module or by doing a Purchase Order / Receiving Order process. YOUR FINAL DATA SYNC WILL ONLY BE AN UPDATE OF YOUR INVENTORY QUANTITIES, so you need to begin entering new products right away. Don't Change Product Titles or ID Codes - Later on in the process when we do your final data sync, we will refer to the titles and product ID codes (UPC, Manufacturer ID, SKU) in order to update your inventory quantities. If you change a product title or ID, that update won't happen for that product! Training - As we mentioned before, you and your team have access to all of the resources of this support site, and in addition to your training calls from your Trainer, your Client Success Manager is available by email or phone and will answer any questions you may have. We will also be happy to show you how to use any part of the system you might want to explore. Data Migration - If we are migrating your POS data, we will do an initial migration of the data it is possible to migrate (your Client Success Manager will have more information for you on what can and cannot be migrated) so you can review it and see how it displays and is used in our system. This will actually happen fairly early in this process so you have time to work with the data and make sure it came over correctly. You will need to keep to the following guidelines to make sure your total migration process works as well as possible: Testing - We will work with you to do final testing on your setup of the system, making sure that each kind of transaction works with your hardware properly in each location and till. You will work with your Account Manager on setting a date for your launch. Launch! - At this point we will plan with you your final Data Sync just prior to your launch day so we can have the latest possible product quantity data (no other data is updated!), after which you will be ready to begin using your new POS in your store(s). Support - From this point forward, your Client Success Manager, Trainer, and Migration Specialist will focus on other clients and you will work with our outstanding Support team, a team that boasts a 24 hour turn-around time on ticket responses and an over 90% satisfaction rating! As you work with the system, you can always call our Support team at 385-404-6200 with any questions or suggestions you may have and we will be happy to assist you. You can also open a support ticket by clicking the question-mark button in the upper right and clicking Contact Support. Getting Started / Help onboarding}'}, {id=191604258913, createdAt=1750439292846, updatedAt=1788375864286, path='pos-equipment-system-requirements-recommended-hardware', name='POS Equipment - System Requirements & Recommended Hardware', 32='{type=number, value=1}', 2='{type=string, value=https://rainpos.my.site.com/s/article/POS-Equipment-System-Requirements-Recommended-Hardware}', 4='{type=list, value=[{id=1, name='rain_pos', order=0, label='Rain POS'}, {id=2, name='like_sew', order=1, label='Like Sew'}, {id=3, name='jewel360', order=2, label='Jewel360'}, {id=4, name='music_shop_360', order=3, label='Music Shop 360'}]}', 37='{type=number, value=2}', 6='{type=string, value=

Because the POS is web-based, the general rule for equipment is that it must work with a computer. If you already have a point of sale system that operates on a computer, it is likely that your existing equipment will work with our system. Specialized hardware, such as a dedicated cash register machine, most likely will not work with our system for its special-function buttons. We have some recommendations for equipment that we have tested, but they are not required for our system. Hardware is an area that can change rapidly so for the latest possible information, if you are in the onboarding process, ask your Client Success Manager. If your system is launched, call our Support team at 385-404-6200 and use option 2.
***Please keep receipts for equipment until you are certain it is compatible with your computer.*
Computer
The POS is web-based, so any computer/tablet with a full-function operating system that connects to the internet should work. Here is a list of minimum requirements to work with our system:
- Windows: We recommend Windows 11. Please note that Microsoft ceased support for Windows 10 in October of 2025.
- Mac: macOS 26.0 Tahoe or later is recommended, but older versions such as Sequoia (15) and Sonoma (14) will work with Like Sew.
- CPU: Windows - Intel Core i3 or better / AMD Ryzen 3 4300 or better. Mac - Intel Core i3 or better.
- RAM: 4GB minimum, 8GB recommended.
- Storage: At least 64GB of hard disk space.
- Ports: At least one USB 2.0 or better port*. It is not recommended to try and use hardware that connects by serial port or parallel port with our system. If you wish to use Ethernet connected printers, you will need to have a network professional set that hardware up for you, our support team does not to local area network setup, as this work cannot be done over the phone.
- Internet: We advise a broadband connection speed of at least 5 - 10 Mbps. You can test your connection speed by going to SpeedTest.net. Be careful to avoid advertisements; the button that starts the test says Begin Test.
Devices such as Netbooks, Chromebooks, iPads, and any Android, Linux, or other operating system devices may experience limited functionality. For utilizing the Point of Sale Register, iPad tablets and similar devices will function just fine as long as you have a wireless receipt printer and barcode scanner. Android tablets often have USB ports you can use to connect more affordable wired receipt printers and barcode scanners.
*Devices such as the iPad do not have a USB port, and printing through a browser from an iPad is not supported so you will need wireless peripheral devices.
Here is a computer that fulfills system requirements from our hardware partners at POSGuys:
21" Touch Screen Display
Intel i3 Processor
8GB RAM
128GB Storage
Windows 10 64-bit
Available Stand (sold separately)
Many of our customers have chosen to go with a standard desktop PC that you can pick up for about $300 - $400. Some of our customers have gone with a touchscreen computer. If you have to buy, get something that you like and that is dependable. If you have any questions, please call us.
Router
For our system, your existing router that is already working for you will usually be sufficient. If you have internet outages that are of concern to you, there is a type of router that will automatically switch over to a cellular connection as a hotspot, to save you as much down time as possible. Understand, this is purely optional, but below is a link to an excellent router by Linksys.
Linksys Router Example > (PC and Mac Compatible)
Barcode Scanner

Nearly any barcode scanner that connects to your computer by USB, Bluetooth, or WiFi will work. USB barcode scanners for a desktop or laptop are generally the most affordable and reliable. Generally, more expensive scanners will have additional features, but may not offer better scanning. Your scanner should be able to read 1D scans in code 128 (just a single read across the barcode), which is something almost all scanners currently available can do.
USB Example > (PC & MAC Compatible)
Portable Wireless Barcode Scanner
If you need something even more portable, for example, to use at a trade show or a remote location, this scanner will work well for you. This unit is designed to connect using Bluetooth to mobile devices such as notebooks (Apple, Windows, or Chromebooks), tablets (iOS or Android), or even phones (iOS, Android, Windows, or Blackberry) to scan 1D barcodes into the device.
Bluetooth Example > (PC & Mac Compatible)
Label Printer
The label printer is used to create barcode labels for products in your store. Look for one that connects to your computer. An inexpensive printer here should work just fine. We frequently set up Dymo 550 series printers and Zebra ZSB series printers. If you have a different type of printer, we can almost certainly help you set it up with our system if it plugs into your computer by USB.
Our system is currently capable of printing to 1" x 1" labels, 2.25" x 1.25" labels, 2" x 3/4" labels, and .4375" x 2.125" 'dumbbell' labels. Click here for more information on where to buy these labels: How to Set Up Your Dymo Label Printer in Windows. If you are a Mac user, here is how to set up your Dymo label printer in MacOS.
Label Printers > (PC & MAC Compatible)
Receipt Printer
Unless you are on a very tight budget, we would recommend spending enough money to purchase a heavier-duty receipt printer. Printers can be found for around $50, but many priced that low will print receipts that aren't very legible or easily scanned. Something in the $200 - $300 range will be more reliable and might save you some headaches in the long run.
We set up Star TSP143 series printers and Epson TM-M30 series printers on a regular basis, but other models work well, too, just make sure it plugs in with USB and can print from your operating system (do a test print from Word or a similar application).
Please note that unless you have your own IT administrator who can set up an Ethernet-based printer, it is recommended you order the USB version, which we can help you set up.
Receipt Printers > (PC & MAC Compatible)
Cash Drawer

Most likely, unless you have a drawer or cash box you prefer, you will want a cash drawer that can plug into your receipt printer so the drawer will pop open after a sale is completed and the receipt starts printing.
Credit Card Terminal
If you are using Like Sew Payments as your credit card processor, the WisePOS E / S700 terminal on the left side in the image above is currently the terminal you'll be using for our U.S. clients. If you are in Canada using Interac, it is likely you have the S1 F2 terminal pictured above. Part of the process of setting up your credit card processing will be informing you of how you will get your terminal so you do not need to buy this separately ahead of time.
Internet Hotspot
What would you do if your internet connection went down in the middle of your business day? Our system depends on the internet to operate, so if you are wanting to make sure you can always connect, having an internet hotspot that uses your cellular service as an alternative is a great option. Contact your mobile service provider for hardware solutions.
}', 38='{type=number, value=0}', 39='{type=number, value=4}', 40='{type=number, value=1}', 9='{type=string, value=POS Equipment - System Requirements & Recommended Hardware}', 22='{type=option, value={id=1, name='featured_content', order=0, label='Featured Content'}}', 23='{type=list, value=[{id=1, name='featured_content', order=0, label='Featured Content'}]}', 24='{type=list, value=[{id=91, name='hardware', order=90, label='Hardware'}]}', 25='{type=number, value=0}', 26='{type=list, value=[{id=190209692688, name='Getting Started'}]}', 28='{type=string, value=POS Equipment - System Requirements & Recommended Hardware Because the POS is web-based, the general rule for equipment is that it must work with a computer. If you already have a point of sale system that operates on a computer, it is likely that your existing equipment will work with our system. Specialized hardware, such as a dedicated cash register machine, most likely will not work with our system for its special-function buttons. We have some recommendations for equipment that we have tested, but they are not required for our system. Hardware is an area that can change rapidly so for the latest possible information, if you are in the onboarding process, ask your Client Success Manager. If your system is launched, call our Support team at 385-404-6200 and use option 2. ***Please keep receipts for equipment until you are certain it is compatible with your computer.* Computer The POS is web-based, so any computer/tablet with a full-function operating system that connects to the internet should work. Here is a list of minimum requirements to work with our system: Windows: We recommend Windows 10 or 11. Please note that in late 2025 Microsoft will cease support for Windows 10. Mac: macOS 12.0 Monterey is recommended, but older versions will work with Like Sew. CPU: Windows - Intel Core i3 or better / AMD Ryzen 3 4300 or better. Mac - Intel Core i3 or better. RAM: 4GB minimum, 8GB recommended. Storage: At least 64GB of hard disk space. Ports: At least one USB 2.0 or better port*. It is not recommended to try and use hardware that connects by serial port or parallel port with our system. If you wish to use Ethernet connected printers, you will need to have a network professional set that hardware up for you, our support team does not to local area network setup, as this work cannot be done over the phone. Internet: We advise a broadband connection speed of at least 5 - 10 Mbps. You can test your connection speed by going to SpeedTest.net. Be careful to avoid advertisements; the button that starts the test says Begin Test. Devices such as Netbooks, Chromebooks, iPads, and any Android, Linux, or other operating system devices may experience limited functionality. For utilizing the Point of Sale Register, iPad tablets and similar devices will function just fine as long as you have a wireless receipt printer and barcode scanner. Android tablets often have USB ports you can use to connect more affordable wired receipt printers and barcode scanners. *Devices such as the iPad do not have a USB port, and printing through a browser from an iPad is not supported so you will need wireless peripheral devices. Here is a computer that fulfills system requirements from our hardware partners at POSGuys: 21" Touch Screen Display Intel i3 Processor 8GB RAM 128GB Storage Windows 10 64-bit Available Stand (sold separately) Like Sew IC-215P-AW3-W10-RN Many of our customers have chosen to go with a standard desktop PC that you can pick up for about $300 - $400. Some of our customers have gone with a touchscreen computer. If you have to buy, get something that you like and that is dependable. If you have any questions, please call us. Router For our system, your existing router that is already working for you will usually be sufficient. If you have internet outages that are of concern to you, there is a type of router that will automatically switch over to a cellular connection as a hotspot, to save you as much down time as possible. Understand, this is purely optional, but below is a link to an excellent router by Linksys. Linksys Router Example > (PC and Mac Compatible) Barcode Scanner Nearly any barcode scanner that connects to your computer by USB, Bluetooth, or WiFi will work. USB barcode scanners for a desktop or laptop are generally the most affordable and reliable. Generally, more expensive scanners will have additional features, but may not offer better scanning. Your scanner should be able to read 1D scans in code 128 (just a single read across the barcode), which is something almost all scanners currently available can do. USB Example > (PC & MAC Compatible) Portable Wireless Barcode Scanner If you need something even more portable, for example, to use at a trade show or a remote location, this scanner will work well for you. This unit is designed to connect using Bluetooth to mobile devices such as notebooks (Apple, Windows, or Chromebooks), tablets (iOS or Android), or even phones (iOS, Android, Windows, or Blackberry) to scan 1D barcodes into the device. Bluetooth Example > (PC & Mac Compatible) Label Printer The label printer is used to create barcode labels for products in your store. Look for one that connects to your computer. An inexpensive printer here should work just fine. We frequently set up Dymo 550 series printers and Zebra ZSB series printers. If you have a different type of printer, we can almost certainly help you set it up with our system if it plugs into your computer by USB. Our system is currently capable of printing to 1" x 1" labels, 2.25" x 1.25" labels, 2" x 3/4" labels, and .4375" x 2.125" 'dumbbell' labels. Click here for more information on where to buy these labels: How to Set Up Your Dymo Label Printer in Windows. Label Printers > (PC & MAC Compatible) Receipt Printer Unless you are on a very tight budget, we would recommend spending enough money to purchase a heavier-duty receipt printer. Printers can be found for around $50, but many priced that low will print receipts that aren't very legible or easily scanned. Something in the $200 - $300 range will be more reliable and might save you some headaches in the long run. We set up Star TSP143 series printers and Epson TM-M30 series printers on a regular basis, but other models work well, too, just make sure it plugs in with USB and can print from your operating system (do a test print from Word or a similar application). Please note that unless you have your own IT administrator who can set up an Ethernet-based printer, it is recommended you order the USB version, which we can help you set up. Receipt Printers > (PC & MAC Compatible) Cash Drawer Most likely, unless you have a drawer or cash box you prefer, you will want a cash drawer that can plug into your receipt printer so the drawer will pop open after a sale is completed and the receipt starts printing. Cash Drawer > Credit Card Terminal If you are using Like Sew Payments as your credit card processor, the WisePOS E / S700 terminal on the left side in the image above is currently the terminal you'll be using for our U.S. clients. If you are in Canada using Interac, it is likely you have the S1 F2 terminal pictured above. Part of the process of setting up your credit card processing will be informing you of how you will get your terminal so you do not need to buy this separately ahead of time. Internet Hotspot What would you do if your internet connection went down in the middle of your business day? Our system depends on the internet to operate, so if you are wanting to make sure you can always connect, having an internet hotspot that uses your cellular service as an alternative is a great option. Contact your mobile service provider for hardware solutions. Getting Started / Help hardware}', 31='{type=number, value=1}'}, {id=191604258941, createdAt=1750439292874, updatedAt=1785597750615, path='rain-payments-adyen-credit-card-terminal-error-codes', name='Adyen Credit Card Terminal Error Codes', 2='{type=string, value=https://rainpos.my.site.com/s/article/Like Sew-Payments-Adyen-Credit-Card-Terminal-Error-Codes}', 4='{type=list, value=[{id=1, name='rain_pos', order=0, label='Rain POS'}, {id=2, name='like_sew', order=1, label='Like Sew'}, {id=3, name='jewel360', order=2, label='Jewel360'}, {id=4, name='music_shop_360', order=3, label='Music Shop 360'}]}', 6='{type=string, value=Occasionally transactions may not succeed and when this happens, and it can often be confusing or frustrating. This can be made more frustrating if the reason for the failure is not clear. In an effort to provide a more seamless user experience, we are providing this information in order to be as transparent as possible. There are many reasons a transaction may not go through but some of the most common include:
- Bank Declines: The most common reason for transaction failures is a decline from the cardholder's bank, which can be due to insufficient funds, reported loss of the card, or suspicion of fraud.
- Technical Issues: Errors can also stem from technical issues such as malfunctions in the terminal, poor network connection, damaged card, or even user error such as removing a card too quickly.
- Incorrect Information: Mistakes like entering the wrong card number, expiration date, or CVV can lead to failures as well.
- Expired Cards: An attempt to use an expired card will always result in a decline, necessitating the use of a valid card.
- Fraud Prevention: Banks have sophisticated fraud detection systems that can flag unusual transaction patterns or locations, leading to declines as a preventative measure.
- Card Restrictions: Some cards have restrictions on the types of transactions they can be used for, such as online purchases or transactions in foreign countries.
- Limit Exceeded: Banks set limits on the amount and frequency of transactions to protect against fraud and overspending, which can lead to declines if exceeded.
Error Codes
The following error codes are visible on the Payments page in the Payment Portal for transactions done after 04/11/2024. These can be found by going to the transaction in question and clicking on it. In the panel on the right, you should see an area with the Status and the error code description.
Please Note: These errors can also be displayed within your POS software. This was a relatively recent release but please reach out to your support team if they are not being displayed, as the error codes can be very useful for sales clerks needing to explain the reason for the failure to the customers.
| Error Code | Error Message | Description | Action |
|---|---|---|---|
API_ERROR |
API Error. Please try again (insert card if possible). | This means that there was an unknown issue with the API that resulted in being unable to read the card. | If a reattempt doesn't work, contact Support and report the error. |
APP_ERROR |
Application error. Please try again (insert card if possible). | This means that there was an unknown issue with the terminal application that resulted in being unable to read the card. | If a reattempt doesn't work, contact Support and report the error. |
EMV_ERROR |
Something went wrong while processing the transaction. Please try again (insert card if possible). | This occurs when the chip card cannot be read. This may result from the cardholder removing the card prematurely or if the card was damaged/scratched. | If a reattempt doesn't work, contact Support and report the error. |
OFFLINE_DECLINE |
Declined. | An offline decline occurs when a transaction is declined without real-time authorization from the cardholder's bank. This typically happens when the terminal is unable to hear back from the card issuer quick enough. This is less common and usually only happens in situations with poor internet connectivity. | If reattempt doesn't work, please have the cardholder try a new card. |
ONLINE_DECLINE |
The processor declined the card. | This is a general decline from the cardholder's bank. It doesn't specify the reason for the decline. The customer should contact their bank for more information. | If reattempt doesn't work, please have the cardholder try a new card. |
POS_CANCEL |
Canceled by clerk. | This message appears when the clerk cancels the transaction from the POS software. | Reattempt the transaction. |
REVERSAL |
Payment declined. | Reversals can occur in several scenarios but it essentially means that authorization for the transaction has been revoked by the cardholder or the cardholder's bank. For all intents and purposes, this behaves like a decline. | If reattempt doesn't work, please have the cardholder try a new card. |
USER_CANCEL |
Canceled by shopper. | This message appears when the cardholder cancels the transaction from the terminal application. | Reattempt the transaction. |
USER_TIMEOUT |
Timed out waiting for shopper. | Occurs when the transaction is sent to the terminal but no card is used. If a card was attempted, the terminal was unable to detect it. | Reattempt the transaction. |
WEB_TIMEOUT |
Connection issue. Please check your network and try again. | The terminal was unable to establish a connection and process the payment. This is likely due to limited internet connection or a temporary interruption in service. | If reattempt doesn't work, please have the merchant check their connection and try again. |
In each of these cases no funds were captured and we are not able to capture them after the fact from that original attempt.
}', 22='{type=option, value={id=3, name='faq', order=2, label='FAQ'}}', 39='{type=number, value=0}', 40='{type=number, value=2}', 9='{type=string, value=P5 (Adyen) Credit Card Terminal Error Codes}', 25='{type=number, value=0}', 26='{type=list, value=[{id=190209692688, name='Getting Started'}]}', 28='{type=string, value=Adyen Credit Card Terminal Error Codes Credit Card Terminal Error Codes for Adyen Summary Occasionally transactions may not succeed and when this happens, and it can often be confusing or frustrating. This can be made more frustrating if the reason for the failure is not clear. In an effort to provide a more seamless user experience, we are providing this information in order to be as transparent as possible. There are many reasons a transaction may not go through but some of the most common include: Bank Declines: The most common reason for transaction failures is a decline from the cardholder's bank, which can be due to insufficient funds, reported loss of the card, or suspicion of fraud. Technical Issues: Errors can also stem from technical issues such as malfunctions in the terminal, poor network connection, damaged card, or even user error such as removing a card too quickly. Incorrect Information: Mistakes like entering the wrong card number, expiration date, or CVV can lead to failures as well. Expired Cards: An attempt to use an expired card will always result in a decline, necessitating the use of a valid card. Fraud Prevention: Banks have sophisticated fraud detection systems that can flag unusual transaction patterns or locations, leading to declines as a preventative measure. Card Restrictions: Some cards have restrictions on the types of transactions they can be used for, such as online purchases or transactions in foreign countries. Limit Exceeded: Banks set limits on the amount and frequency of transactions to protect against fraud and overspending, which can lead to declines if exceeded. Error Codes The following error codes are visible on the Payments page in the Payment Portal for transactions done after 04/11/2024. These can be found by going to the transaction in question and clicking on it. In the panel on the right, you should see an area with the Status and the error code description. Please Note: These errors can also be displayed within your POS software. This was a relatively recent release but please reach out to your support team if they are not being displayed, as the error codes can be very useful for sales clerks needing to explain the reason for the failure to the customers. Error Code Error Message Description Action API_ERROR API Error. Please try again (insert card if possible). This means that there was an unknown issue with the API that resulted in being unable to read the card. If a reattempt doesn't work, contact Support and report the error. APP_ERROR Application error. Please try again (insert card if possible). This means that there was an unknown issue with the terminal application that resulted in being unable to read the card. If a reattempt doesn't work, contact Support and report the error. EMV_ERROR Something went wrong while processing the transaction. Please try again (insert card if possible). This occurs when the chip card cannot be read. This may result from the cardholder removing the card prematurely or if the card was damaged/scratched. If a reattempt doesn't work, contact Support and report the error. OFFLINE_DECLINE Declined. An offline decline occurs when a transaction is declined without real-time authorization from the cardholder's bank. This typically happens when the terminal is unable to hear back from the card issuer quick enough. This is less common and usually only happens in situations with poor internet connectivity. If reattempt doesn't work, please have the cardholder try a new card. ONLINE_DECLINE The processor declined the card. This is a general decline from the cardholder's bank. It doesn't specify the reason for the decline. The customer should contact their bank for more information. If reattempt doesn't work, please have the cardholder try a new card. POS_CANCEL Canceled by clerk. This message appears when the clerk cancels the transaction from the POS software. Reattempt the transaction. REVERSAL Payment declined. Reversals can occur in several scenarios but it essentially means that authorization for the transaction has been revoked by the cardholder or the cardholder's bank. For all intents and purposes, this behaves like a decline. If reattempt doesn't work, please have the cardholder try a new card. USER_CANCEL Canceled by shopper. This message appears when the cardholder cancels the transaction from the terminal application. Reattempt the transaction. USER_TIMEOUT Timed out waiting for shopper. Occurs when the transaction is sent to the terminal but no card is used. If a card was attempted, the terminal was unable to detect it. Reattempt the transaction. WEB_TIMEOUT Connection issue. Please check your network and try again. The terminal was unable to establish a connection and process the payment. This is likely due to limited internet connection or a temporary interruption in service. If reattempt doesn't work, please have the merchant check their connection and try again. In each of these cases no funds were captured and we are not able to capture them after the fact from that original attempt. Getting Started / Help hardware payment processing}'}, {id=191604258953, createdAt=1750439292886, updatedAt=1789586752803, path='rain-payments-p5-credit-card-terminal', name='Integrated Payments: P5 Credit Card Terminal', 32='{type=number, value=1}', 2='{type=string, value=https://rainpos.my.site.com/s/article/Like Sew-Payments-P5-Credit-Card-Terminal}', 35='{type=number, value=1}', 4='{type=list, value=[{id=1, name='rain_pos', order=0, label='Rain POS'}, {id=2, name='like_sew', order=1, label='Like Sew'}, {id=3, name='jewel360', order=2, label='Jewel360'}, {id=4, name='music_shop_360', order=3, label='Music Shop 360'}]}', 36='{type=number, value=1}', 6='{type=string, value=
(image source: wiseasy.com)
Setup and Use of the P5
Connectivity and Updates
The Wiseasy P5 Terminal is plug-and-play; Simply connect it to a local Wi-Fi network, enter the pairing code, and start taking payments in minutes. The P5 device is also low-maintenance with no additional upkeep required. Updates happen automatically using the Wi-Fi network with no interruptions and no hassle.
Power and Battery
When you first receive the device, it should come partially charged. Use the USB-C wall charger to begin charging the device to full power.
When it's been charged for at least 30 minutes, hold down the power button on the right hand side until the screen turns on. Once the device is powered on, pressing the power button once will sleep/wake the device. To fully power off the device hold down the power button until the Power Off option is shown on the screen, then select it. If you need to replace the battery, lift up from the indentation at the bottom-center of the back cover to detach it from the device.
Please Note: Ideally the terminal should be powered off each evening and powered on each morning to receive automatic software updates.
Internet Connection
Wi-Fi Setup
- Once the device is powered on, unlock the device by using your finger to swipe from the bottom of the screen to the top of the screen.
- Once on the Home screen, repeat this process by swiping up again to show the device applications.
- Tap on the Settings app and navigate to Network & Internet.
- Select the WiFi network and enter your network details.
Please Note: The Wi-Fi network must use WPA-Personal or WPA2-Personal encryption and must be password protected. WiFi is not supported for non-password-protected networks or enterprise networks.
Ethernet Setup
USB-C to Ethernet adapters or cables may be purchased separately to use with a wired ethernet connection if Wi-Fi is not available. We currently have two options for the P5 terminal, either the adapter mentioned here, or an optional cradle for the terminal.
Please Note: There may be options for a charging cradle or dock you can purchase from us. Please contact us for current options.
Once either a USB-C adapter or the cradle / dock are plugged in, ethernet capabilities can be enabled by following the steps below:
- Once the device is powered on, unlock the device by using your finger to swipe from the bottom of the screen to the top of the screen.
- On the Home screen, repeat this process by swiping up again to show the device applications.
- Tap on the Settings app and navigate to Network & Internet.
- At the top of the screen, tap the Ethernet button.
- Turn the button ON to enable it.
- Then press the central circle button at the bottom of the screen to exit the Settings page.
Time and Date Setup
- Swipe up from the bottom of the screen toward the top to bring up the app list.
- Tap on Settings (If you don't see Settings as an option, you may need to close the Quilt app. Do this by tapping the four corners one at a time. This should bring you to a Config screen. Tap the Close Application button.).
- Tap on System.
- Tap on Date & Time.
- Uncheck Use Network-Provided Time.
- Uncheck Use Network-Provided Time Zone.
- Tap on Time Zone and select the appropriate region.
- Tap on the Date and enter the appropriate date.
- Tap on the time and enter the appropriate time.
Opening the Application
On some older versions of the P5 terminal, the Quilt PayFac application may not open by default and must be clicked on like an app on a smart phone.
- Once the device is powered on, unlock the device by using your finger to swipe from the bottom of the screen to the top of the screen.
- Once on the Home screen, repeat this process by swiping up again to show the device applications.
- There you should see an app called Quilt P5, Tap on that app to launch it.
How to Pair the Terminal to the POS
When the device is powered up and connected to Wi-Fi for the first time, it should display a three-word pairing code. Once you have this code, log in to your Point of Sale admin account and go to Settings by clicking on your username in the top right corner.
Please Note: This area takes several seconds to load.
When the page loads you will see a tab for Integrations. Click on that, and then click the Like Sew option in the subtabs, as pictured below.
At this point, you should see a screen like the one pictured below. If there is a message instead that you are not configured to use integrated Payments, you will need to finish the setup in Payments Portal.
Click the Add New button at the bottom of the screen and choose P5 from the terminal options. Then follow the instructions on the screen to finish pairing the device.
Please Note: You will not be able to get back to the Settings area for your P5 if the Quilt PayFac app is open on the device. To close it, tap all four corners of the screen at once and swipe up.
Basic Troubleshooting
If you are experiencing issues with your terminal, you can try clearing the cache / storage on the device and then re-starting. Follow these steps to do so:
- Close the app by tapping the four corners one at a time and then swiping up.
- Swipe up from the bottom of the screen toward the top to bring up the app list.
- Tap and hold the icon for the Quilt P5 Terminal app.
- Tap the App Info menu item that pops up.
- Tap the Force Stop icon on the top-right.
- On the same screen, scroll down to Storage and Cache and tap it.
- Tap on the Clear Storage icon.
- Then tap on the Clear cache icon.
- Press the Back button at the bottom left of the screen.
- Tap on the Open icon at the top left of the screen to restart the app.
If you are still experiencing issues, please call our support team for further assistance.
}', 8='{type=string, value=
(image source: wiseasy.com)
Setup and Use of the P5
Connectivity and Updates
The Wiseasy P5 Terminal is plug-and-play; Simply connect it to a local Wi-Fi network, enter the pairing code, and start taking payments in minutes. The P5 device is also low-maintenance with no additional upkeep required. Updates happen automatically using the Wi-Fi network with no interruptions and no hassle.
Power and Battery
When you first receive the device, it should come partially charged. Use the USB-C wall charger to begin charging the device to full power.
When it's been charged for at least 30 minutes, hold down the power button on the right hand side until the screen turns on. Once the device is powered on, pressing the power button once will sleep/wake the device. To fully power off the device hold down the power button until the Power Off option is shown on the screen, then select it. If you need to replace the battery, lift up from the indentation at the bottom-center of the back cover to detach it from the device.
Please Note: Ideally the terminal should be powered off each evening and powered on each morning to receive automatic software updates.
Internet Connection
Wi-Fi Setup
- Once the device is powered on, unlock the device by using your finger to swipe from the bottom of the screen to the top of the screen.
- Once on the Home screen, repeat this process by swiping up again to show the device applications.
- Tap on the Settings app and navigate to Network & Internet.
- Select the WiFi network and enter your network details.
Please Note: The Wi-Fi network must use WPA-Personal or WPA2-Personal encryption and must be password protected. WiFi is not supported for non-password-protected networks or enterprise networks.
Ethernet Setup
USB-C to Ethernet adapters or cables may be purchased separately to use with a wired ethernet connection if Wi-Fi is not available. We currently have two options for the P5 terminal, either the adapter mentioned here, or an optional cradle for the terminal.
Please Note: There may be options for a charging cradle or dock you can purchase from us. Please contact us for current options.
Once either a USB-C adapter or the cradle / dock are plugged in, ethernet capabilities can be enabled by following the steps below:
- Once the device is powered on, unlock the device by using your finger to swipe from the bottom of the screen to the top of the screen.
- On the Home screen, repeat this process by swiping up again to show the device applications.
- Tap on the Settings app and navigate to Network & Internet.
- At the top of the screen, tap the Ethernet button.
- Turn the button ON to enable it.
- Then press the central circle button at the bottom of the screen to exit the Settings page.
Time and Date Setup
- Swipe up from the bottom of the screen toward the top to bring up the app list.
- Tap on Settings (If you don't see Settings as an option, you may need to close the Quilt app. Do this by tapping the four corners one at a time. This should bring you to a Config screen. Tap the Close Application button.).
- Tap on System.
- Tap on Date & Time.
- Uncheck Use Network-Provided Time.
- Uncheck Use Network-Provided Time Zone.
- Tap on Time Zone and select the appropriate region.
- Tap on the Date and enter the appropriate date.
- Tap on the time and enter the appropriate time.
Opening the Application
On some older versions of the P5 terminal, the Quilt PayFac application may not open by default and must be clicked on like an app on a smart phone.
- Once the device is powered on, unlock the device by using your finger to swipe from the bottom of the screen to the top of the screen.
- Once on the Home screen, repeat this process by swiping up again to show the device applications.
- There you should see an app called Quilt P5, Tap on that app to launch it.
How to Pair the Terminal to the POS
When the device is powered up and connected to Wi-Fi for the first time, it should display a three-word pairing code. Once you have this code, log in to your Point of Sale admin account and go to Settings by clicking on your username in the top right corner.
Please Note: This area takes several seconds to load.
When the page loads you will see a tab for Integrations. Click on that, and then click the Like Sew option in the subtabs, as pictured below.
At this point, you should see a screen like the one pictured below. If there is a message instead that you are not configured to use integrated Payments, you will need to finish the setup in Payments Portal.
Click the Add New button at the bottom of the screen and choose P5 from the terminal options. Then follow the instructions on the screen to finish pairing the device.
Please Note: You will not be able to get back to the Settings area for your P5 if the Quilt PayFac app is open on the device. To close it, tap all four corners of the screen at once and swipe up.
Basic Troubleshooting
If you are experiencing issues with your terminal, you can try clearing the cache / storage on the device and then re-starting. Follow these steps to do so:
- Close the app by tapping the four corners one at a time and then swiping up.
- Swipe up from the bottom of the screen toward the top to bring up the app list.
- Tap and hold the icon for the Quilt P5 Terminal app.
- Tap the App Info menu item that pops up.
- Tap the Force Stop icon on the top-right.
- On the same screen, scroll down to Storage and Cache and tap it.
- Tap on the Clear Storage icon.
- Then tap on the Clear cache icon.
- Press the Back button at the bottom left of the screen.
- Tap on the Open icon at the top left of the screen to restart the app.
If you are still experiencing issues, please call our support team for further assistance.
}', 9='{type=string, value=Integrated Payments: P5 Credit Card Terminal}', 43='{type=option, value={id=1, name='featured_content', order=0, label='Featured Content'}}', 16='{type=list, value=[{id=5, name='lifesaver_software', order=4, label='LifeSaver Software'}]}', 22='{type=option, value={id=3, name='faq', order=2, label='FAQ'}}', 25='{type=number, value=0}', 26='{type=list, value=[{id=190209692688, name='Getting Started'}]}', 28='{type=string, value=Integrated Payments: P5 Credit Card Terminal (image source: wiseasy.com) Setup and Use of the P5 Connectivity and Updates The Wiseasy P5 Terminal is plug-and-play; Simply connect it to a local Wi-Fi network, enter the pairing code, and start taking payments in minutes. The P5 device is also low-maintenance with no additional upkeep required. Updates happen automatically using the Wi-Fi network with no interruptions and no hassle. Power and Battery When you first receive the device, it should come partially charged. Use the USB-C wall charger to begin charging the device to full power. When it's been charged for at least 30 minutes, hold down the power button on the right hand side until the screen turns on. Once the device is powered on, pressing the power button once will sleep/wake the device. To fully power off the device hold down the power button until the Power Off option is shown on the screen, then select it. If you need to replace the battery, lift up from the indentation at the bottom-center of the back cover to detach it from the device. Please Note: Ideally the terminal should be powered off each evening and powered on each morning to receive automatic software updates. Internet Connection Wi-Fi Setup Once the device is powered on, unlock the device by using your finger to swipe from the bottom of the screen to the top of the screen. Once on the Home screen, repeat this process by swiping up again to show the device applications. Tap on the Settings app and navigate to Network & Internet. Select the WiFi network and enter your network details. Please Note: The Wi-Fi network must use WPA-Personal or WPA2-Personal encryption and must be password protected. WiFi is not supported for non-password-protected networks or enterprise networks. Ethernet Setup USB-C to Ethernet adapters or cables may be purchased separately to use with a wired ethernet connection if Wi-Fi is not available. We currently have two options for the P5 terminal, either the adapter mentioned here, or an optional cradle for the terminal. Please Note: There may be options for a charging cradle or dock you can purchase from us. Please contact us for current options. Once either a USB-C adapter or the cradle / dock are plugged in, ethernet capabilities can be enabled by following the steps below: Once the device is powered on, unlock the device by using your finger to swipe from the bottom of the screen to the top of the screen. On the Home screen, repeat this process by swiping up again to show the device applications. Tap on the Settings app and navigate to Network & Internet. At the top of the screen, tap the Ethernet button. Turn the button ON to enable it. Then press the central circle button at the bottom of the screen to exit the Settings page. Time and Date Setup Swipe up from the bottom of the screen toward the top to bring up the app list. Tap on Settings (If you don't see Settings as an option, you may need to close the Quilt app. Do this by tapping the four corners one at a time. This should bring you to a Config screen. Tap the Close Application button.). Tap on System. Tap on Date & Time. Uncheck Use Network-Provided Time. Uncheck Use Network-Provided Time Zone. Tap on Time Zone and select the appropriate region. Tap on the Date and enter the appropriate date. Tap on the time and enter the appropriate time. Opening the Application On some older versions of the P5 terminal, the Quilt PayFac application may not open by default and must be clicked on like an app on a smart phone. Once the device is powered on, unlock the device by using your finger to swipe from the bottom of the screen to the top of the screen. Once on the Home screen, repeat this process by swiping up again to show the device applications. There you should see an app called Quilt P5, Tap on that app to launch it. How to Pair the Terminal to the POS When the device is powered up and connected to Wi-Fi for the first time, it should display a three-word pairing code. Once you have this code, log in to your Point of Sale admin account and go to Settings by clicking on your username in the top right corner. Please Note: This area takes several seconds to load. When the page loads you will see a tab for Integrations. Click on that, and then click the Like Sew option in the subtabs, as pictured below. At this point, you should see a screen like the one pictured below. If there is a message instead that you are not configured to use integrated Payments, you will need to finish the setup in Payments Portal. Click the Add New button at the bottom of the screen and choose P5 from the terminal options. Then follow the instructions on the screen to finish pairing the device. Please Note: You will not be able to get back to the Settings area for your P5 if the Quilt PayFac app is open on the device. To close it, tap all four corners of the screen at once and swipe up. Basic Troubleshooting If you are experiencing issues with your terminal, you can try clearing the cache / storage on the device and then re-starting. Follow these steps to do so: Close the app by tapping the four corners one at a time and then swiping up. Swipe up from the bottom of the screen toward the top to bring up the app list. Tap and hold the icon for the Quilt P5 Terminal app. Tap the App Info menu item that pops up. Tap the Force Stop icon on the top-right. On the same screen, scroll down to Storage and Cache and tap it. Tap on the Clear Storage icon. Then tap on the Clear cache icon. Press the Back button at the bottom left of the screen. Tap on the Open icon at the top left of the screen to restart the app. If you are still experiencing issues, please call our support team for further assistance. Getting Started / Help hardware payment processing}', 31='{type=number, value=0}'}, {id=191604258954, createdAt=1750439292887, updatedAt=1788610796282, path='rain-payments-payment-portal', name='Your Processing Payment Portal', 32='{type=number, value=1}', 2='{type=string, value=https://rainpos.my.site.com/s/article/Like Sew-Payments-Payment-Portal}', 35='{type=number, value=0}', 4='{type=list, value=[{id=1, name='rain_pos', order=0, label='Rain POS'}, {id=2, name='like_sew', order=1, label='Like Sew'}, {id=3, name='jewel360', order=2, label='Jewel360'}, {id=4, name='music_shop_360', order=3, label='Music Shop 360'}, {id=5, name='lifesaver_software', order=4, label='LifeSaver Software'}]}', 36='{type=number, value=1}', 6='{type=string, value=
Payment Portal
The Payment Portal is a dashboard included as part of our payments offering. It allows users to view or edit account details, review recent transactions, process new sales, view reports, and manage disputes. As an extra security measure, we’ve also hosted this page independently which means should the POS software ever experience any outages, this would continue to function and serve as a backup allowing you to continue processing transactions without interruption.
Please Note: The Payment Portal is not backwards compatible so transactions done through the Virtual Terminal will NOT show up in the POS software and inventory will not be affected.
Account Details Page
When a user first logins in, they are taken to the Account Details page. At the top of the page, users can see their Account Status, Payment Status, and Payouts Status. If an account has not completed their application, then these statuses will remain Disabled. Once the account has been completed and approved, these statuses will change.
This page is where all account information can be found including:
- Account Name
- Country
- Currency
- Business Type
- Account ID
- Statement Descriptor (the name displayed on consumer’s credit card statement)
You can also view all processing fees, account requirements, bank account, and hardware information. For accounts with multiple locations, you can also view the additional locations associated with your account.
Users can come back to this page by going to Settings > Account Details.
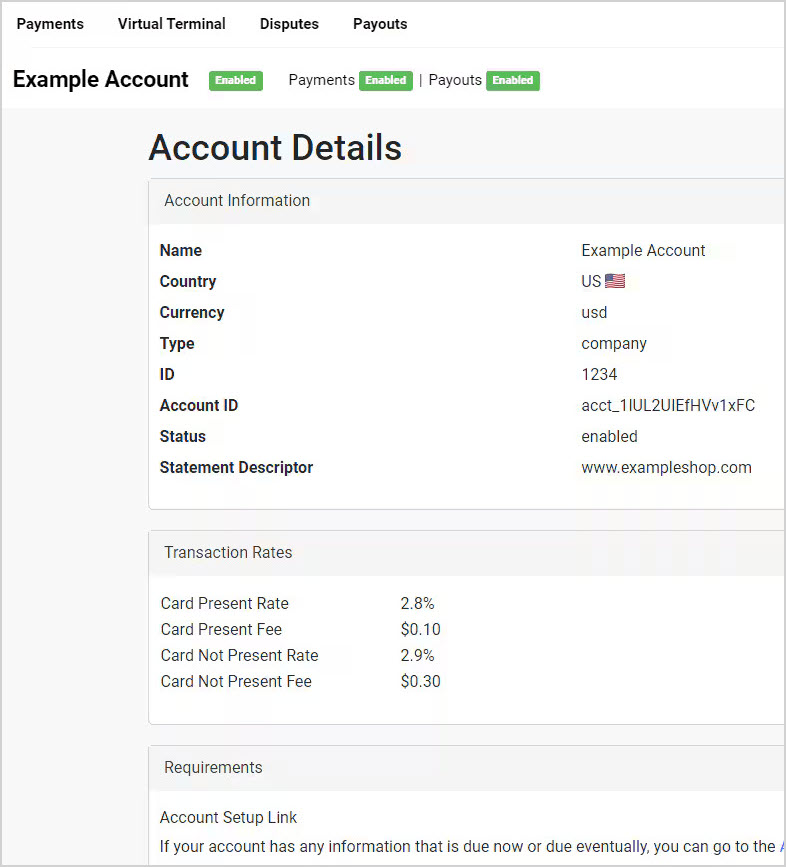
Payments Page
This page shows all recent transactions processed through the POS or website. Date Ranges of up to 30 days can be used to filter the results as well as using the ‘Status’ filter or searching using the Transaction ID or Amount.
On the table below you can see the following information:
- Amount
- Currency
- Status
- Transaction ID
- Date
Each row can be clicked on which will show more information about the transaction.
This page can also be printed or exported using the icons at the top right-hand corner.
Please Note: It may take up to 5 minutes for a transaction to appear so if you don’t see it, please refresh the page.
To refund a transaction, click on the appropriate row and click on ‘Refund’ towards the bottom of the page. This action cannot be undone
Virtual Terminal
This page allows transactions to be accepted outside the POS. This is primarily only intended for when the POS cannot be used. The following information can be collected on this page:
- Transaction Amount
- Name on the Card
- Postal or Zip Code associated with the card
- Card Number
- Expiration Date
- Security Code
- Notes (this is where inventory, transaction details, and other information can be collected for later use)
Once the information is filled out, click the green ‘Charge’ button to process the sale.
The ‘Clear’ button will clear the page.
Please Note:
- Negative balances (unreferenced refunds) are NOT supported
- The Payment Portal is not backwards compatible so transactions done through the Virtual Terminal will NOT show up in the POS software and inventory will not be affected.
Disputes
When a dispute is received the Administrator on the account should receive an email notification. Users can respond to, and manage, disputes on this page. The following information is available on this page and can be filtered by Date and Status:
- Transaction ID
- Transaction Amount
- Dispute Amount (may differ from the Transaction Amount)
- Dispute Reason
- Date Opened
- Date Closed
- Respond by (Date)
- Status
- Action
To submit evidence in a dispute, click on the ‘Submit Evidence’ button in the appropriate row. Additional details will be visible and information about the transaction will need to be filled out. Once the form is filled out, the blue ‘Submit Evidence’ button can be pressed to submit the information.
Please Note: This action cannot be undone
To accept a dispute without submitting evidence, press the ‘Accept Dispute’ button.
This page can also be printed or exported using the icons at the top right-hand corner.
Payouts
This page is used to display deposit information is available as soon as the payout has been initiated, which can be filtered by Date or by searching the Payout ID.
This page is intended to be as transparent as possible, showing the breakdown of Fees, Refunds, and Deposits.
The following information is available in the table below:
- Payout Date
- Payout ID
- Bank Account
- Payout Status
- Collected (Gross Total)
- Fees
- Refunds
- Net
Each row can also be clicked to see the individual transactions that made up that Payout.
This page can also be printed or exported using the icons at the top right-hand corner
Manage Users
Users can be edited or added by going to Settings > Manage Users. The following information is available for Users:
- First Name
- Last Name
- Created Date
- Updated Date
- Last Login Date
- Delete action
To add a new User, press the blue ‘Create User’ button. From here, a new user can be added and given specific permissions.
Please Note: Login access can be added or disabled without affecting permissions.
}', 39='{type=number, value=0}', 40='{type=number, value=1}', 9='{type=string, value=Your Processing Payment Portal}', 22='{type=option, value={id=1, name='featured_content', order=0, label='Featured Content'}}', 25='{type=number, value=0}', 26='{type=list, value=[{id=190209692546, name='Reports'}, {id=190209692688, name='Getting Started'}]}', 28='{type=string, value=Your Processing Payment Portal Payment Portal The Payment Portal is a dashboard included as part of our payments offering. It allows users to view or edit account details, review recent transactions, process new sales, view reports, and manage disputes. As an extra security measure, we’ve also hosted this page independently which means should the POS software ever experience any outages, this would continue to function and serve as a backup allowing you to continue processing transactions without interruption. Please Note: The Payment Portal is not backwards compatible so transactions done through the Virtual Terminal will NOT show up in the POS software and inventory will not be affected. Account Details Page When a user first logins in, they are taken to the Account Details page. At the top of the page, users can see their Account Status, Payment Status, and Payouts Status. If an account has not completed their application, then these statuses will remain Disabled. Once the account has been completed and approved, these statuses will change. This page is where all account information can be found including: Account Name Country Currency Business Type Account ID Statement Descriptor (the name displayed on consumer’s credit card statement) You can also view all processing fees, account requirements, bank account, and hardware information. For accounts with multiple locations, you can also view the additional locations associated with your account. Users can come back to this page by going to Settings > Account Details. Payments Page This page shows all recent transactions processed through the POS or website. Date Ranges of up to 30 days can be used to filter the results as well as using the ‘Status’ filter or searching using the Transaction ID or Amount. On the table below you can see the following information: Amount Currency Status Transaction ID Date Each row can be clicked on which will show more information about the transaction. This page can also be printed or exported using the icons at the top right-hand corner. Please Note: It may take up to 5 minutes for a transaction to appear so if you don’t see it, please refresh the page. To refund a transaction, click on the appropriate row and click on ‘Refund’ towards the bottom of the page. This action cannot be undone Virtual Terminal This page allows transactions to be accepted outside the POS. This is primarily only intended for when the POS cannot be used. The following information can be collected on this page: Transaction Amount Name on the Card Postal or Zip Code associated with the card Card Number Expiration Date Security Code Notes (this is where inventory, transaction details, and other information can be collected for later use) Once the information is filled out, click the green ‘Charge’ button to process the sale. The ‘Clear’ button will clear the page. Please Note:- Negative balances (unreferenced refunds) are NOT supported- The Payment Portal is not backwards compatible so transactions done through the Virtual Terminal will NOT show up in the POS software and inventory will not be affected. Disputes When a dispute is received the Administrator on the account should receive an email notification. Users can respond to, and manage, disputes on this page. The following information is available on this page and can be filtered by Date and Status: Transaction ID Transaction Amount Dispute Amount (may differ from the Transaction Amount) Dispute Reason Date Opened Date Closed Respond by (Date) Status Action To submit evidence in a dispute, click on the ‘Submit Evidence’ button in the appropriate row. Additional details will be visible and information about the transaction will need to be filled out. Once the form is filled out, the blue ‘Submit Evidence’ button can be pressed to submit the information. Please Note: This action cannot be undone To accept a dispute without submitting evidence, press the ‘Accept Dispute’ button. This page can also be printed or exported using the icons at the top right-hand corner. Payouts This page is used to display deposit information is available as soon as the payout has been initiated, which can be filtered by Date or by searching the Payout ID. This page is intended to be as transparent as possible, showing the breakdown of Fees, Refunds, and Deposits. The following information is available in the table below: Payout Date Payout ID Bank Account Payout Status Collected (Gross Total) Fees Refunds Net Each row can also be clicked to see the individual transactions that made up that Payout. This page can also be printed or exported using the icons at the top right-hand corner Manage Users Users can be edited or added by going to Settings > Manage Users. The following information is available for Users: First Name Last Name Email Created Date Updated Date Last Login Date Delete action To add a new User, press the blue ‘Create User’ button. From here, a new user can be added and given specific permissions. Please Note: Login access can be added or disabled without affecting permissions. Reports,Getting Started / Help administrative payment processing}', 31='{type=number, value=1}'}, {id=191604259088, createdAt=1750439292951, updatedAt=1771530353400, path='what-do-i-do-if-my-internet-or-the-rain-system-goes-down', name='What do I do if my internet or the POS system goes down?', 2='{type=string, value=https://rainpos.my.site.com/s/article/What-do-I-do-if-my-internet-or-the-Like Sew-system-goes-down}', 4='{type=list, value=[{id=1, name='rain_pos', order=0, label='Rain POS'}, {id=2, name='like_sew', order=1, label='Like Sew'}, {id=3, name='jewel360', order=2, label='Jewel360'}, {id=4, name='music_shop_360', order=3, label='Music Shop 360'}]}', 37='{type=number, value=0}', 6='{type=string, value=
In today's world of cloud computing, it's extremely convenient to have data and functionality easily available on any device. But that asset can, on rare occasions, become a liability if something happens and the system goes down. It doesn't matter if you're a giant like Amazon or Ebay or if you're a small business trying to make your way; if your system goes down, it can seriously hurt your business.
So how do you keep doing transactions if your internet or Like Sew itself is experiencing an outage? Below are a couple of options.
Before we get into that, it's also important to understand the nature of cloud computing and its reliability. Like many of the best online systems, Like Sew experiences only a handful of 'down hours' yearly. It doesn't matter what the company is or how big: everyone experiences down time for a wide variety of reasons. Denial of service cyber attacks are a growing concern, where foreign hackers assault global servers to overwhelm them with fake data requests. Hardware outages or system architecture glitches can also be responsible for downtime, so you should expect for your system to have several hours of down time per year, and some of those hours are likely to hit you during your open business hours.
Similarly, Internet Service Providers also experience down time, so if your service provider experiences an outage in your area, that can cause similar hardship during your open hours.
Best Option for Internet Outage: Use Your Smartphone as a Mobile Hotspot Device
If your internet service provider goes down, it is likely you already have an alternate network in place that can give you temporary internet service until your regular system comes back online. All major cellular data service providers offer tethering apps you can use directly on your phone to turn it into a wireless internet connection. They also provide devices that do this service even better using your cellular account. Please refer to the resources below for how to set up your phone as a mobile hotspot:
Best Option for a System Outage: Use Your Processor's Virtual Terminal, Record Transaction Details
So the good news is that if the system does go down, you still have a way to take card payments online so you can continue to conduct business throughout the outage. You will have to do some things manually, however. You'll need to record the following details for each transaction so you can create the transactions in the system once it's back up and running
Please Note: Do not ever write down a customer's card information! This represents a significant security risk.
- Customer Name
- Time / Date of Transaction
- Items in Transaction
- Method of Payment
- Amount of Payment / Change Given
- Email Address - Be sure to email them a copy of their receipt once the system is back up and you enter the transaction into the system (see below)
If they are paying with a credit or debit card, you should have a window open for the Payments virtual terminal up and running so you can run the card charge. The terminal will allow you to put in the amount of the charge (don't forget the tax!) and process the payment. It will NOT send that information to the system, so you'll be putting the amount information in manually. Also, you will not be able to process refunds directly in the system for transactions done this way. You will need to come back into the terminal to do so.
If you use a different processor, please contact them for information on how to log into your virtual terminal.
How do I put in the transactions?
For each, you will need to do the following:
- Load the Customer
- Load the Items
- Apply discounts / coupon codes
- Change the Date / Time - Click on the date link in the upper right, and change it to the time and date the transaction originally happened.
- For the payment method(s), if they paid by card, be sure to turn integration Off before entering the amount.
- When you complete the transaction, when you get to the Receipt step, be sure to email the customer a receipt.
How do I know if the outage is on my end or on Like Sew's?
Any time we have a major issue with the system, we post a notice on the main Home screen you see when you first log in, and if you're already logged in, it will pop up at the top of the next page you load in the system. You can also always check the status of the system any time you need by clicking here:
Whenever an outage happens, our team is working on fixing it within minutes, but in the system message and on the status page, we will try to put up an estimate of when we expect the affected area of the system to be back up and running, if it is possible to give such an estimate.
If the above link does not load the page for some reason, and if other web pages such as google.com are loading just fine, it is likely our system is down completely and we are working on bringing it back up again.
}', 22='{type=option, value={id=3, name='faq', order=2, label='FAQ'}}', 38='{type=number, value=1}', 39='{type=number, value=0}', 40='{type=number, value=1}', 9='{type=string, value=What do I do if my internet or the POS system goes down?}', 25='{type=number, value=0}', 26='{type=list, value=[{id=190209692688, name='Getting Started'}]}', 28='{type=string, value=What do I do if my internet or the POS system goes down? In today's world of cloud computing, it's extremely convenient to have data and functionality easily available on any device. But that asset can, on rare occasions, become a liability if something happens and the system goes down. It doesn't matter if you're a giant like Amazon or Ebay or if you're a small business trying to make your way; if your system goes down, it can seriously hurt your business. So how do you keep doing transactions if your internet or Like Sew itself is experiencing an outage? Below are a couple of options. Before we get into that, it's also important to understand the nature of cloud computing and its reliability. Like many of the best online systems, Like Sew experiences only a handful of 'down hours' yearly. It doesn't matter what the company is or how big: everyone experiences down time for a wide variety of reasons. Denial of service cyber attacks are a growing concern, where foreign hackers assault global servers to overwhelm them with fake data requests. Hardware outages or system architecture glitches can also be responsible for downtime, so you should expect for your system to have several hours of down time per year, and some of those hours are likely to hit you during your open business hours. Similarly, Internet Service Providers also experience down time, so if your service provider experiences an outage in your area, that can cause similar hardship during your open hours. Best Option for Internet Outage: Use Your Smartphone as a Mobile Hotspot Device If your internet service provider goes down, it is likely you already have an alternate network in place that can give you temporary internet service until your regular system comes back online. All major cellular data service providers offer tethering apps you can use directly on your phone to turn it into a wireless internet connection. They also provide devices that do this service even better using your cellular account. Please refer to the resources below for how to set up your phone as a mobile hotspot: Best Option for a System Outage: Use Your Processor's Virtual Terminal, Record Transaction Details So the good news is that if the system does go down, you still have a way to take card payments online so you can continue to conduct business throughout the outage. You will have to do some things manually, however. You'll need to record the following details for each transaction so you can create the transactions in the system once it's back up and running Please Note: Do not ever write down a customer's card information! This represents a significant security risk. Customer Name Time / Date of Transaction Items in Transaction Method of Payment Amount of Payment / Change Given Email Address - Be sure to email them a copy of their receipt once the system is back up and you enter the transaction into the system (see below) If they are paying with a credit or debit card, you should have a window open for the Payments virtual terminal up and running so you can run the card charge. The terminal will allow you to put in the amount of the charge (don't forget the tax!) and process the payment. It will NOT send that information to the system, so you'll be putting the amount information in manually. Also, you will not be able to process refunds directly in the system for transactions done this way. You will need to come back into the terminal to do so. If you use a different processor, please contact them for information on how to log into your virtual terminal. How do I put in the transactions? For each, you will need to do the following: Load the Customer Load the Items Apply discounts / coupon codes Change the Date / Time - Click on the date link in the upper right, and change it to the time and date the transaction originally happened. For the payment method(s), if they paid by card, be sure to turn integration Off before entering the amount. When you complete the transaction, when you get to the Receipt step, be sure to email the customer a receipt. How do I know if the outage is on my end or on Like Sew's? Any time we have a major issue with the system, we post a notice on the main Home screen you see when you first log in, and if you're already logged in, it will pop up at the top of the next page you load in the system. You can also always check the status of the system any time you need by clicking here: Whenever an outage happens, our team is working on fixing it within minutes, but in the system message and on the status page, we will try to put up an estimate of when we expect the affected area of the system to be back up and running, if it is possible to give such an estimate. If the above link does not load the page for some reason, and if other web pages such as google.com are loading just fine, it is likely our system is down completely and we are working on bringing it back up again. Getting Started / Help system basics}'}]Filter by Category
- Inventory
- Marketing
- Customers
- Register
- Modules
- Purchasing
- Inventory
- Website
- Website
- Settings
- Settings
- Register
- Modules
- Getting Started
- Customers
- Register
- Inventory
- Inventory
- Inventory
- Register
- Modules
- Purchasing
- Modules
- Inventory
- Customers
- Customers
- Settings
- Marketing
- Website
- Getting Started
- Admin
- Website
- Modules
- Getting Started
- Settings
- Getting Started
- Website
- Getting Started
- Getting Started
- Getting Started
- Getting Started
- Getting Started
- Marketing
- Getting Started
- Getting Started
- Getting Started
- Admin
- Reports
- Getting Started
- Getting Started
- Admin
- Settings
- Getting Started
- Getting Started
- Getting Started
- Getting Started
- Admin
- Settings
- Getting Started
- Admin
- Getting Started
- Admin
- Getting Started
- Getting Started
- Getting Started
- Getting Started
- Register
- Reports
- Getting Started
- Register
- Getting Started
- Getting Started
- Getting Started
- Getting Started
- Getting Started
- Getting Started
- Getting Started
- Admin
- Getting Started
- Getting Started
- Admin
- Getting Started
- Getting Started
- Getting Started
- Getting Started
- Getting Started
- Getting Started
- Getting Started
- Admin
- Getting Started
- Getting Started
- Getting Started
- Getting Started
- Getting Started
- Getting Started
- Getting Started
- Getting Started
- Getting Started
- Admin
- Inventory
- Settings
- Getting Started
- Getting Started
- Getting Started
- Getting Started
- Getting Started
- Admin
- Settings
- Getting Started
- Getting Started
- Getting Started
- Getting Started
- Getting Started
- Getting Started
- Purchasing
- Admin
- Getting Started
- Website
- Getting Started
- Getting Started
- Getting Started
- Settings
- Getting Started
- Marketing
- Website
- Website
- Website
- Purchasing
- Settings
- Getting Started
- Website
- Marketing
- Settings
- Getting Started
- Getting Started
- Inventory
- Website
- Inventory
- Website
- Getting Started
- Website
- Settings
- Website
- Settings
- Settings
- Settings
- Settings
- Inventory
- Admin
- Inventory
- Settings
- Website
- Settings
- Website
- Getting Started
- Website
- Marketing
- Settings
- Website
- Settings
- Website
- Settings
- Website
- Settings
- Website
- Settings
- Marketing
- Settings
- Getting Started
- Getting Started
- Getting Started
- Getting Started
- Getting Started
- Getting Started
- Getting Started
- Getting Started
- Inventory
- Marketing
- Getting Started
- Getting Started
- Getting Started
- Getting Started
- Getting Started
- Getting Started
- Getting Started
- Getting Started
- Getting Started
- Getting Started
- Register
- Reports
- Admin
- Register
- Settings
- Settings
- Settings
- Inventory
- Inventory
- Settings
- Settings
- Getting Started
- Admin
- Getting Started
- Admin
- Register
- Register
- Modules
- Settings
- Getting Started
- Marketing
- Register
- Marketing
- Inventory
- Register
- Inventory
- Inventory
- Inventory
- Customers
- Register
- Settings
- Register
- Modules
- Website
- Settings
- Website
- Settings
- Getting Started
- Website
- Modules
- Website
- Orders
- Inventory
- Inventory
- Website
- Website
- Admin
- Getting Started
- Marketing
- Inventory
- Register
- Marketing
- Register
- Register
- Register
- Inventory
- Website
- Settings
- Customers
- Customers
- Website
- Settings
- Marketing
- Website
- Getting Started
- Marketing
- Website
- Website
- Getting Started
- Website
- Marketing
- Settings
- Getting Started
- Website
- Settings
- Website
- Settings
- Website
- Settings
- Admin
- Getting Started
- Inventory
- Getting Started
- Admin
- Marketing
- Settings
- Inventory
- Website
- Inventory
- Website
- Website
- Getting Started
- Getting Started
- Getting Started
- Register
- Modules
- Purchasing
- Website
- Orders
- Admin
- Getting Started
- Website
- Getting Started
- Admin
- Customers
- Admin
- Customers
- Customers
- Website
- Inventory
- Inventory
- Website
- Website
- Customers
- Inventory
- Getting Started
- Inventory
- Inventory
- Orders
- Settings
- Inventory
- Purchasing
- Marketing
- Inventory
- Inventory
- Inventory
- Website
- Inventory
- Modules
- Getting Started
- Getting Started
- Website
- Website
- Getting Started
- Website
- Customers
- Register
- Modules
- Reports
- Customers
- Settings
- Register
- Modules
- Register
- Modules
- Modules
- Getting Started
- Customers
- Modules
- Getting Started
- Inventory
- Register
- Modules
- Settings
- Reports
- Marketing
- Register
- Settings
- Marketing
- Inventory
- Admin
- Inventory
- Inventory
- Settings
- Orders
- Settings
- Customers
- Settings
- Customers
- Purchasing
- Website
- Settings
- Modules
- Purchasing
- Modules
- Settings
- Inventory
- Settings
- Inventory
- Website
- Purchasing
- Inventory
- Website
- Settings
- Getting Started
- Inventory
- Register
- Register
- Register
- Reports
- Inventory
- Marketing
- Marketing
- Admin
- Reports
- Register
- Marketing
- Settings
- Website
- Marketing
- Customers
- Settings
- Inventory
- Inventory
- Register
- Inventory
- Register
- Reports
- Website
- Modules
- Settings
- Website
- Getting Started
- Website
- Orders
- Getting Started
- Getting Started
- Website
- Getting Started
- Website
- Settings
- Getting Started
- Admin
- Getting Started
- Register
- Settings
- Getting Started
- Settings
- Getting Started
- Settings
- Getting Started
- Admin
- Getting Started
- Settings
- Getting Started
- Admin
- Getting Started
- Reports
- Getting Started
- Orders
- Settings
- Getting Started
- Website
- Settings
- Getting Started
- Website
- Settings
- Getting Started
- Website
- Settings
- Getting Started
- Marketing
- Website
- Customers
- Register
- Modules
- Orders
- Settings
- Getting Started
- Inventory
- Website
- Register
- Orders
- Settings
- Getting Started
- Website
- Settings
- Getting Started
- Website
- Settings
- Getting Started
- Inventory
- Website
- Getting Started
- Website
- Getting Started
- Website
- Website
- Modules
- Website
- Purchasing
- Website
- Modules
- Website
- Settings
- Getting Started
- Inventory
- Inventory
- Purchasing
- Website
- Getting Started
- Settings
- Getting Started
- Getting Started
- Getting Started
- Getting Started
- Getting Started
- Getting Started
- Website
- Getting Started
- Website
- Getting Started
- Website
- Modules
- Settings
- Reports
- Website
- Settings
- Settings
- Getting Started
- Website
- Settings
- Website
- Settings
- Website
- Settings
- Website
- Settings
- Inventory
- Purchasing
- Settings
- Inventory
- Purchasing
- Settings
- Inventory
- Purchasing
- Settings
- Inventory
- Purchasing
- Settings
- Marketing
- Website
- Inventory
- Inventory
- Reports
- Inventory
- Getting Started
- Customers
- Register
- Modules
- Settings
- Website
- Settings
- Getting Started
- Website
- Settings
- Getting Started
- Website
- Settings
- Register
- Modules
- Settings
- Register
- Settings
- Marketing
- Getting Started
- Website
- Website
- Orders
- Settings
- Marketing
- Website
- Settings
- Marketing
- Website
- Settings
- Inventory
- Settings
- Getting Started
- Customers
- Register
- Modules
- Website
- Getting Started
- Inventory
- Reports
- Modules
- Register
- Getting Started
- Inventory
- Settings
- Marketing
- Settings
- Inventory
- Settings
- Inventory
- Inventory
- Register
- Modules
- Settings
- Getting Started
- Register
- Website
- Orders
- Inventory
- Purchasing
- Register
- Modules
- Website
- Register
- Settings
- Register
- Modules
- Getting Started
- Customers
- Modules
- Settings
- Customers
- Register
- Settings
- Register
- Settings
- Modules
- Settings
- Purchasing
- Settings
- Inventory
- Modules
- Settings
- Settings
- Register
- Settings
- Getting Started
- Register
- Modules
- Settings
- Getting Started
- Inventory
- Inventory
- Settings
- Inventory
- Inventory
- Inventory
- Inventory
- Inventory
- Inventory
- Inventory
- Inventory
- Website
- Inventory
- Inventory
- Inventory
- Inventory
- Inventory
- Inventory
- Purchasing
- Modules
- Settings
- Settings
- Settings
- Settings
- Settings
- Settings
- Settings
- Settings
- Getting Started
- Getting Started
- Getting Started
- Getting Started
- Getting Started
- Getting Started
- Getting Started
- Getting Started
- Reports
- Getting Started
- Getting Started
- Getting Started
- Getting Started
- Purchasing
- Register
- Settings
- Getting Started
- Customers
- Register
- Register
- Settings
- Getting Started
- Marketing
- Register
- Settings
- Reports
- Marketing
- Register
- Settings
- Reports
- Reports
- Reports
- Reports
- Getting Started
- Reports
- Reports
- Reports
- Reports
- Reports
- Inventory
- Register
- Modules
- Admin
- Register
- Settings
- Reports
- Reports
- Marketing
- Website
- Settings
- Register
- Settings
- Website
- Register
- Settings
- Register
- Website
- Register
- Settings
- Getting Started
- Getting Started
- Getting Started
- Admin
- Admin
- Register
- Reports
- Inventory
- Settings
- Settings
- Website
- Register
- Modules
- Purchasing
- Inventory
- Getting Started
- Customers
- Register
- Settings
- Register
- Settings
- Website
- Marketing
- Register
- Modules
- Admin
- Register
- Settings
- Inventory
- Purchasing
- Settings
- Purchasing
- Purchasing
- Customers
- Register
- Reports
- Inventory
- Website
- Modules
- Settings
- Reports
- Website
- Website
- Website
- Modules
- Settings
- Marketing
- Settings
- Website
- Settings
- Website
- Settings
- Admin
- Getting Started
- Getting Started
- Admin
- Getting Started
- Admin
- Website
- Getting Started
- Getting Started
- Register
- Getting Started
- Admin
- Getting Started
- Admin
- Website
- Admin
- Admin
- Inventory
- Settings
- Getting Started
- Register
- Inventory
- Register
- Modules
- Settings
- Marketing
- Website
- Getting Started
- Marketing
- Inventory
- Inventory
- Inventory
- Inventory
- Inventory
- Inventory
- Inventory
- Register
- Register
- Register
- Register
- Register
- Register
- Register
- Register
- Purchasing
- Purchasing
- Inventory
- Admin
- Marketing
- Marketing
- Marketing
- Marketing
- Modules
- Marketing
- Register
- Register
- Inventory
- Reports
- Settings
- Admin
- Settings
- Marketing
- Settings
- Admin
- Inventory
- Admin
- Admin
- Admin
- Admin
- Admin
- Admin
- Admin
- Admin
- Admin
- Admin
- Admin
- Admin
- Getting Started
- Admin
- Admin
- Admin
- Admin
- Admin
- Admin
- Admin
- Marketing
- Admin
- Payments
- Admin
- Admin
- Marketing
- Admin
- Admin
- Admin
- Admin
- Admin
- Admin
Search results for: P5 Credit Card Terminal
AI Overview
Sort by Relevance
Description
No exact match found. We are trying to find relevant matches. Please wait or add a new keyword.
Need Help?
Can't quite find the answer you're looking for? Our support team is just a call away.